Most rust-removal advice treats every rusty tool the same way: soak it in vinegar, scrub with a wire brush, done. But a light haze on a shovel blade and heavy pitted rust on a pruning shear’s cutting edge call for genuinely different approaches, and using the wrong one is exactly how a tool ends up damaged instead of restored. This guide breaks down which method fits which situation, and just as importantly, what specifically causes damage during rust removal so you can avoid it.
Match the Method to the Rust, Not Just What’s in Your Garage
Before reaching for anything, look at what you’re actually dealing with:
- Light surface rust (a haze or light orange film, no pitting): mild abrasion with fine steel wool or nylon bristles, or a short vinegar soak, is all you need.
- Moderate rust (visible flaking, some texture change): a full vinegar soak or a baking soda paste, followed by light scrubbing.
- Heavy, pitted rust (deep orange, rough texture, metal loss visible): a longer soak, a dedicated commercial rust remover, or in extreme cases, sandblasting.
- Rust on a cutting edge specifically (pruning shears, loppers, hoes): start with the gentlest method that will work. Aggressive abrasion here doesn’t just remove rust, it removes metal from an edge you’ll then need to resharpen.
Reaching for the most aggressive method by default, rather than matching it to what the tool actually needs, is the single most common way people damage a tool while trying to save it.
What Actually Damages Tools During Rust Removal
Over-soaking in vinegar. Vinegar’s acetic acid dissolves rust effectively, but left too long it starts etching into good metal, not just the rust layer. Check tools after a few hours rather than leaving them in overnight by default.
Wire brushing stainless steel. A steel or brass wire brush can leave fine scratches on stainless surfaces, and those scratches trap moisture, ironically creating new rust-prone spots where the surface used to resist corrosion. Use a nylon brush on stainless, and save wire brushes for plain carbon steel.
Aggressive sanding or grinding on cutting edges. It removes rust fast, but it also removes the edge’s geometry, meaning you’ll need a full resharpening afterward that a gentler method would have avoided.
Over-soaking wood handles. If a tool head is riveted or epoxied to a wood handle, extended submersion can swell or crack the wood at the joint. Keep the soak focused on the metal where possible, or wrap exposed wood before submerging.
Skipping the dry-and-oil step. Removing rust without protecting the now-bare metal afterward just resets the clock, bare steel left exposed to moisture rusts again within days.

Vinegar Soak – The Go-To Method
White vinegar’s acetic acid reacts with rust (iron oxide) to form iron acetate, which is water-soluble and lifts away with minimal scrubbing. Submerge the rusted part fully, check at the 1-hour mark for light rust and up to 8 hours for moderate rust, then scrub gently with steel wool or a brush matched to the material (see the wire brush section below), rinse thoroughly, and dry immediately. Don’t leave tools soaking overnight by default, that’s well past the point of diminishing returns and into the territory of etching good metal.
Baking Soda Paste – For Tools You Can’t Submerge
For larger tools like shovels and spades, or rust near a wood handle joint you don’t want to soak, mix baking soda with a small amount of water into a thick paste, spread it over the rusted area, and let it sit for about an hour before scrubbing and rinsing. It’s gentler than a full vinegar soak and works well for moderate rust in a localized spot.
Wire Brush and Steel Wool – Using Abrasion Without Scratching

Match the brush material to the surface: nylon bristles are safe on stainless steel and finished surfaces without scratching; brass bristles clean unfinished metal effectively while being soft enough not to gouge; stainless steel bristles handle heavy-duty rust on plain carbon steel but will scratch stainless surfaces and should be avoided there. A three-material set like this one covers all three cases without guessing which brush is safe for a given tool.
Commercial Rust Removers, Electrolysis, and Sandblasting – For Heavy, Stubborn Rust
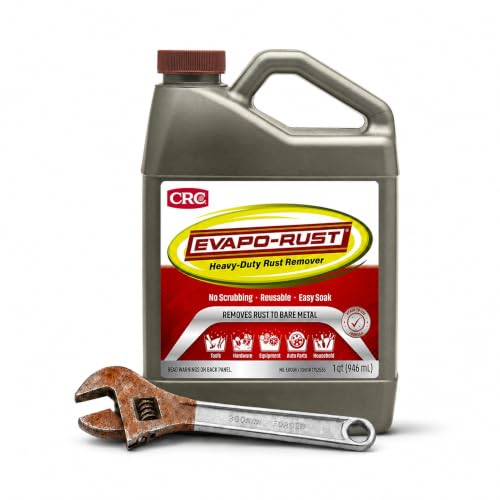
For rust that a vinegar soak doesn’t fully clear, a dedicated rust remover like Evapo-Rust is water-based, acid-free, and safe on copper, brass, aluminum, plastic, and rubber in addition to steel, which makes it a lower-risk option than vinegar for tools with mixed materials (a wood-handled trowel with a brass ferrule, for example). No scrubbing or sanding required, just soak and rinse.
Electrolysis (using a battery charger and a sacrificial piece of scrap metal in a water bath) works well for heavily rusted tools but requires a ventilated space and some setup, better suited to a specific problem tool than routine maintenance. For rust so heavy the metal itself is pitted and textured, sandblasting is the most aggressive but most thorough option, our guide to sandblasters covers picks specifically suited to rust removal on tools and hardware.
After the Rust Is Gone – Protecting Tools From Coming Back
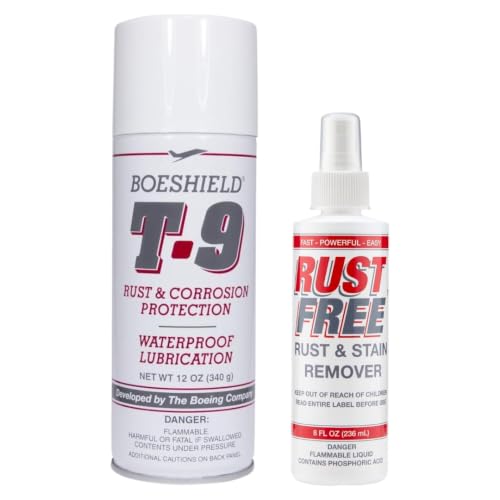
Dry tools completely immediately after rinsing, don’t let them air dry slowly, towel-dry them right away. Once dry, apply a light coat of protective oil to the bare metal. Boeshield T-9 was originally developed for aerospace use and leaves a waxy coating that displaces moisture and protects metal for months, a meaningfully longer-lasting option than a quick wipe of household oil.
Store tools somewhere dry, ideally off the ground and out of direct contact with damp soil or concrete, and wipe them down after each use rather than letting dirt and moisture sit on the metal between uses.
Frequently Asked Questions
Does vinegar damage metal if left too long?
Yes. Vinegar’s acetic acid will start etching into good metal once it’s dissolved the rust layer, not just sitting inertly. Check tools within a few hours rather than leaving them soaking overnight as a default.
Can you use rust remover on stainless steel garden tools?
Most commercial rust removers and vinegar are safe on stainless steel, the bigger risk with stainless is the abrasion step afterward. Use a nylon brush rather than a wire steel brush to avoid scratching the surface.
How often should tools be checked to prevent rust?
A quick wipe-down and dry after each use prevents most rust before it starts. A more thorough check, cleaning, and oil reapplication once or twice a season (before storing for winter and again in spring) catches anything that slipped through.
Is WD-40 good for rust prevention or just removal?
WD-40’s original formula is primarily a water displacer and light lubricant, it helps loosen light surface rust and displaces moisture short-term, but it’s not a long-term protective coating. For lasting rust prevention after cleanup, a dedicated protective oil like Boeshield T-9 holds up longer than a general-purpose spray.
Bottom Line
Match the method to the rust: light abrasion or a short vinegar soak for surface rust, a full soak or paste for moderate rust, and a commercial remover or sandblasting for heavy, pitted rust. On cutting edges, always start gentle to avoid creating extra sharpening work. And whichever method you use, the step people skip, drying immediately and applying a protective oil, is what actually keeps the rust from coming back. If your pruning shears need a touch-up after de-rusting, our guide to pruning shears and the tools covered in our garden trowel roundup are common candidates for this exact maintenance routine.