

Programming a LiftMaster remote takes about a minute and one trip up a step ladder. On most openers you press the Learn button on the motor unit, then hold the button on your remote until the opener lights blink. That’s it.
The steps change in three situations, and those are where most people get stuck: a new white-button opener (Security+ 3.0), a new-style LiftMaster remote on an older opener, and a car’s built-in HomeLink buttons. This guide covers all of them, plus keypads and what to do when nothing works.
- Press and release the Learn button on the opener motor unit. The small LED next to it turns on.
- Within 30 seconds, press and hold the remote button you want to use.
- Let go when the opener lights blink or you hear two clicks.
- Test the remote.
Warning: do not hold the Learn button down. Holding it for about 6 seconds erases every remote and keypad from the opener.
Jump to: Find the Learn Button | Standard Method | White Button (3.0) | New Remote, Older Opener | From the Wall Control | Keypad | Car / HomeLink | Erase All Remotes | Troubleshooting | FAQ
Before You Start: Find Your Learn Button (and Its Color)
The Learn button is a small square or round button on the motor unit that hangs from the garage ceiling. It usually sits on the back or side panel, near where the antenna wire hangs down. On some models you have to pop off the light lens cover to see it. On wall-mounted (jackshaft) openers it is on the unit beside the door.
The color of that button tells you which programming method to use, and which remotes will pair at all.
| Learn Button | Rough Build Years | Radio System | Method in This Guide |
|---|---|---|---|
| Green | 1993 to about 1997 | Billion Code, 390 MHz | Standard method (MAX-series remotes only) |
| Red / Orange | About 1997 to 2005 | Security+, 390 MHz | Standard method |
| Purple | About 2005 to 2014 | Security+, 315 MHz | Standard method |
| Yellow | About 2011 to 2025 | Security+ 2.0 | Standard method |
| White | Late 2025 onward | Security+ 3.0 | White button method (myQ app or Learn button) |
Source: LiftMaster’s remote compatibility chart (retrieved 2026-09-29). Colors fade with age, so purple can look brown and yellow can look amber.
If the remote you bought does not list your button color, it probably will not pair no matter how you program it. Our guide to the best LiftMaster remotes matches each remote to each color.
Two quick checks before you climb the ladder:
- Put a fresh battery in the remote. A weak coin cell is the most common reason programming “fails.”
- Clear the door path. When programming works, the door may move, so keep cars, kids and pets out of the way.
Method 1: The Standard Learn Button Method (Yellow, Purple, Red/Orange, Green)

This works for most genuine LiftMaster remotes (893MAX, 890MAX, 892LT and similar) and most compatible remotes on openers built before late 2025.
- Press and release the Learn button. Tap it, do not hold it. The Learn LED next to the button lights up and stays on for about 30 seconds.
- Press and hold the remote button you want to use for this door, within those 30 seconds. Stand where you can see the opener lights.
- Release when the opener lights blink or you hear two clicks. That means the opener has saved the remote’s code.
- Test it. Press the button again. The door should open or close.
Repeat for each remote and each button. A 3-button remote can run three doors, but each button is programmed separately, one opener at a time.
Green button note: green-button openers only accept “MAX” series genuine remotes and some keypads. Most compatible remotes skip green. See the remote guide before you buy one.
Method 2: New White-Button Openers (Security+ 3.0)
LiftMaster openers sold from late 2025 have a white Learn button and use Security+ 3.0. They only pair with current genuine LiftMaster and Chamberlain remotes. Third-party and older remotes will not work, no matter the method.
LiftMaster gives three ways to pair a 3.0 remote such as the L991S, L993S or L993M. These steps follow the L993M manual and LiftMaster’s L991S/L993S instructions (both retrieved 2026-09-29).
Option A: myQ app (LiftMaster’s recommended method)
- Check that your opener has a “Wi-Fi” or “Powered by myQ” logo.
- Download the myQ app and connect your opener to it.
- Scan the QR code on the back of the remote.
- Follow the in-app steps. The app also lets you name each remote and see which one was used.
Option B: Learn button
- Press and immediately release the Learn button. The Learn LED turns on.
- Within 30 seconds, press and hold the remote button.
- Release when the opener lights flash or you hear two clicks.
Option C: Wall control
Put the opener into programming mode from the wall control (see Method 4), then press and hold the remote button within 30 seconds until the lights flash or you hear clicks.
Method 3: New LiftMaster Remote (L993M or L932M) on an Older Opener
This is the one that trips people up. The newer “M” remotes (L993M 3-button and L932M 2-button) work on white-button openers and on yellow, purple and red/orange ones. But on the older openers, they need an extra step first. If you skip it, the remote looks dead.
Per the L993M manual:
- Hold the two smaller buttons on the remote together for about 6 seconds, until the red LED on the remote stays on.
- Press and release the Learn button on the opener.
- Within 20 seconds, press and release your chosen remote button twice.
- Within 3 seconds of the door moving, press any remote button once.
- Test the remote.
If it does not work, wait for the Learn LED to go out (the manual says this can take up to 3 minutes) and start again from step 1.
Need one of these remotes? The LiftMaster L993M is the one to buy if you have, or plan to get, a white-button opener.

Method 4: Program From the Wall Control (No Ladder)
Many LiftMaster wall controls can put the opener into programming mode, so you do not need to reach the motor unit. The L993M manual lists three wall control types:
- Push-button wall control with a lift-up bar: lift the bar and press the Learn button under it twice.
- Wall control with a separate light button: press and hold the light button, then press the push button.
- Smart Control Panel (screen with menu): go to Menu, then Program, then Remote.
Then press and hold your remote button within 30 seconds until the opener lights blink or you hear clicks. (For an L993M or L932M on an older opener, do the two-button reset from Method 3 first.)
Note that the 880LMW Smart Control Panel only works with yellow-button Security+ 2.0 openers, according to LiftMaster support (retrieved 2026-09-29).
How to Program a LiftMaster Keypad (877MAX / 878MAX)
A wireless keypad outside the door is the easiest backup for a lost remote. These steps come from the 878MAX instruction sheet (retrieved 2026-09-29).
Yellow Learn button
- Press and release the Learn button on the opener. The LED lights up.
- On the keypad, enter the 4-digit PIN you want.
- Press and hold Enter until the opener light blinks or you hear two clicks.
- Test by entering the PIN and pressing Enter.
Other Learn button colors
The keypad first needs to be told which radio system to use. In short: hold * and # until the keypad lights stop blinking, enter your PIN and press #, press Enter the number of times your manual lists for your button color, press 0, then press Learn on the opener and hold Enter until the lights flash. The number of Enter presses varies by color, so follow the chart in your keypad’s manual.
Change the PIN
Enter the current PIN, then hold # until the opener light blinks twice. Enter the new PIN and press Enter. (The manual notes that green-button openers cannot change a PIN this way. You reprogram instead.)
Temporary PIN for a guest or contractor
Enter your PIN, then hold * until the opener light blinks three times. Enter a temporary 4-digit PIN and press Enter (the light blinks four times). Then set how long it lasts: the 878MAX lets you enter a number of hours (up to 255) and finish with * or #, depending on the option you want. Check your keypad’s manual for which key does what.
Keypad options: the genuine LiftMaster 878MAX (4.7 stars across 4,164 Amazon ratings when checked on September 29, 2026) covers green through yellow buttons. The GIOATY universal keypad is a budget option for purple, yellow, red/orange and green, but it does not support white-button 3.0 openers.

How to Program a LiftMaster Opener to Your Car (HomeLink)
Most cars with garage buttons in the mirror or visor use HomeLink. Programming happens in two stages: the car copies your remote, then the opener learns the car. These steps follow HomeLink’s own training instructions (retrieved 2026-09-29). Your car’s manual may add model-specific steps.
Yellow, purple or red/orange Learn button
- Train the car button. Sit in the car with the engine on (or in accessory mode). Hold your LiftMaster remote 1 to 3 inches from the HomeLink buttons. Press and hold the HomeLink button you want to use and the remote button at the same time.
- Watch the HomeLink light. Keep holding until it changes from a slow flash to a solid light or a rapid flash. Then let go of both.
- Press the Learn button on the opener. The Learn LED turns on. You now have about 20 seconds.
- Get back in the car and press and release the HomeLink button. Repeat the press and release up to three times until the door moves.
A helper makes this much easier. One person presses Learn, the other sits in the car.
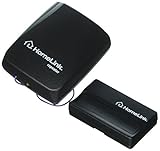
Still won’t pair on a yellow-button opener? Some older HomeLink versions cannot talk to Security+ 2.0 at all. LiftMaster sells a HomeLink Compatibility Bridge for exactly this. It plugs in near the opener and converts the car’s signal into one the opener accepts. The LiftMaster 855LM bridge had 4.0 stars across 1,574 Amazon ratings when we checked on September 29, 2026. Per the listing, it does not work with Security+ 3.0 openers.
White Learn button (Security+ 3.0)
The process is different. Per this Security+ 3.0 HomeLink guide (retrieved 2026-09-29):
- You need HomeLink version 4, 5 or 6, which is common in 2016 and newer vehicles. Compatibility still varies by make and model.
- HomeLink must be trained from a Security+ 3.0 remote that is already paired to the opener. You do not use the opener’s Learn button.
- Press the HomeLink button until its light flashes slowly, then hold the 3.0 remote a few inches away and press its button until the HomeLink light flashes rapidly. Finish these steps within 90 seconds.
- Test by pressing the HomeLink button for 3 to 5 seconds. The door should move on the second press.
Can you program a car without a remote? On a white-button opener, no. You need a paired 3.0 remote to train the car. On older openers, you also need a working remote for the first stage, so buy or borrow one first.
Programming a Chamberlain or Universal Remote to a LiftMaster
Chamberlain and LiftMaster are made by the same company and use the same radio systems. A Chamberlain remote built for your Learn button color programs to a LiftMaster opener using the same steps above.
Universal remotes are the same story with one rule: the listing must name your Learn button color. LiftMaster’s own L992U universal remote covers white, yellow, purple, red/orange and green according to LiftMaster’s compatibility chart. Third-party universal remotes do not support white-button openers.
How to Erase All Remotes and Keypads
Do this if you lose a remote, buy a house, or a former tenant still has a clicker.
- Press and hold the Learn button on the opener for about 6 seconds, until the Learn LED goes out.
- Every remote and keypad code is now erased.
- Reprogram the remotes and keypads you want to keep, using the methods above.
On myQ-connected openers you can also remove individual remotes in the app, without wiping the rest.
Moved into a house with an existing keypad? After erasing, also set a new keypad PIN. Our older guide on changing a LiftMaster code covers that step on its own.
Remote Won’t Program? Troubleshooting Table
| What Happens | Likely Cause | Fix |
|---|---|---|
| Learn LED does not light up | No power to opener, or you pressed the wrong button | Check the outlet and breaker. Confirm you pressed the Learn button, not the light or force controls. |
| LED lights, but nothing happens when you press the remote | Remote not compatible with your Learn button color, or dead battery | Check the color against the remote’s listing. Replace the remote battery. |
| New L993M or L932M seems dead on an older opener | Skipped the two-button reset | Follow Method 3 exactly. |
| Lights blink but the door does not move (white button) | Normal on Security+ 3.0 | Press the remote button again to test. |
| Learn LED stays on and programming will not start over | Opener still in programming mode | Wait for the LED to go out. The L993M manual says this can take up to 3 minutes. |
| Remote programmed, but only works up close | Weak battery, antenna wire bent or tucked away, or a budget remote with short range | New battery. Let the opener antenna hang straight down. |
| Wall button works, remote does not | Lock mode on the wall control, or a sensor error | Turn off lock mode. If the lights flash a pattern, look it up in our LiftMaster error code list. |
| Door will not close by remote, flashes 4 then 6 times | Safety sensor blocked or misaligned | See our error code 4-6 fix. The remote is fine. |
| Door starts, then reverses after a few inches | Mechanical or travel module problem, not a remote problem | See our error code 1-5 guide. |
If your opener beeps or has a battery warning light, a failing backup battery can also cause odd behavior. Our LiftMaster battery replacement guide covers both the opener battery and the remote coin cell.
Frequently Asked Questions
Where is the Learn button on a LiftMaster?
On the motor unit, usually on the back or side panel near the antenna wire. On some models it sits under the light lens cover. On wall-mount (jackshaft) openers it is on the unit next to the door.
How do I reprogram my garage door remote?
Press and release the Learn button, then hold the remote button within 30 seconds until the opener lights blink. You do not need to erase the remote first. If you want to remove old or lost remotes, hold the Learn button for about 6 seconds to erase all codes, then reprogram the ones you keep.
How do I program a 4-button garage door remote?
The same way as any LiftMaster remote. Each button is programmed on its own: press Learn, then hold the button you want for that door. Repeat for the next door with the next button.
Which LiftMaster model do I have?
Look for the model number sticker on the motor unit, often on the side or under the light cover. The Learn button color alone tells you enough to choose a remote and a programming method.
Does programming a new remote erase the old ones?
No. Pressing and releasing Learn adds a remote. Only holding Learn for about 6 seconds erases everything.
Can I program a LiftMaster remote without a ladder?
Often yes. Many wall controls can put the opener into programming mode. See Method 4. White-button owners can also use the myQ app.
Why won’t my new remote program?
The most common reasons are a remote that does not support your Learn button color, a weak remote battery, and (for the L993M or L932M on older openers) skipping the two-button reset. Work through the troubleshooting table above.
Bottom Line
- Yellow, purple, red/orange or green button: tap Learn, hold the remote button until the lights blink. Done.
- White button: use the myQ app or the Learn button, and only genuine 3.0 remotes like the L993M.
- New L993M on an older opener: do the two-button reset first.
- Car won’t learn on a yellow opener: try the HomeLink bridge.
- Need a new remote or keypad: start with our best LiftMaster remotes guide, which sorts every pick by Learn button color.
Affiliate disclosure: ProtGuide earns a commission on qualifying Amazon purchases made through links on this page, at no extra cost to you.


