

Crown molding meeting at an inside corner. A dovetail’s waste that needs removing without touching the baseline. A jewelry box lid with an interior cutout that has no accessible edge to start from. None of these projects can be handled cleanly by a miter saw, a jigsaw, or a rotary tool — they all need the thin, maneuverable, replaceable blade of a coping saw.
What makes a coping saw genuinely unique among saws is its C-shaped frame holding a thin blade under tension between two pins. That thin blade can turn tight curves a wider blade can’t follow, and because the blade unclips from the frame, you can thread it through a small drilled hole to start a cut in the middle of a workpiece — something no other handsaw can do.
This guide covers 5 coping saws available on Amazon right now, along with the technique guidance most buying guides skip entirely: how to actually cope a molding joint, how to set blade tension correctly, and how to start an interior cutout. Whether you’re a trim carpenter, a furniture maker doing hand-cut dovetails, or a hobbyist tackling scroll work, there’s a clear pick here for your project.
Quick Comparison: Best Coping Saws (2026)
| Product | Blade Length | Blades Included | Grip Type | Best For |
|---|---|---|---|---|
| IRWIN ProTouch 2014400 | 6-1/2″ | 1 (stock) | Cushioned ProTouch | Best Overall |
| JORGENSEN Pro Coping Saw | 6-1/2″ | 3 (1 stock + 2 spare) | Ergonomic handle | Best Value |
| Coping Saw Frame Set | Standard | 5 (wood/metal/plastic) | Standard handle | Best Multi-Material Kit |
| KATA 6.5″ Coping Saw | 6.5″ | 6 (14/18/24 TPI) | TPR soft grip | Best for Precision/Craft |
| Stanley 15-106 | 6-3/8″ | Pack of 6 saws | Hardwood handle | Best Bulk Pack for Trim Pros |
Coping Saw vs. Fret Saw vs. Jigsaw vs. Scroll Saw
Before choosing a specific saw, make sure a coping saw is actually the right tool category for your project — these four tools are frequently confused, and picking the wrong one leads to a frustrating result.
Coping Saw
A hand tool with a thin, replaceable blade held under tension in a C-shaped frame. The defining strength is tight curve control and the ability to make interior piercing cuts by threading the blade through a drilled starter hole. Handles stock up to roughly 1.5 inches thick comfortably. This is the right tool for coping molding joints, removing dovetail waste, and hand-cut curved work in furniture and trim carpentry.
Fret Saw / Jeweler’s Saw
Visually similar to a coping saw but uses an even thinner blade and typically has a much deeper frame throat, allowing the blade to reach further into a workpiece. Fret saws are built for very fine detail work in thin material — marquetry, jewelry, intricate scroll patterns in veneer or thin plywood. They’re not a substitute for coping molding or removing dovetail waste in thicker stock; the thin blade lacks the rigidity for that kind of work.
Jigsaw
A powered tool that cuts much faster than any hand saw, but sacrifices precision on tight interior curves. A jigsaw blade is wider and stiffer than a coping saw blade, so it can’t follow the same tight radius, and it can’t match a coping saw’s control when you’re carefully following a molding profile line. Good for rough curved cuts in larger panels; not a replacement for detail coping work.
Scroll Saw
A stationary power tool designed specifically for intricate interior cutouts and fine curved work — essentially a powered, bench-mounted version of what a coping saw or fret saw does by hand. Excellent for shop-based detail work but not portable, which rules it out for on-site trim carpentry where you’re coping molding in place.
Decision Rule
For on-site trim coping, hand-cut dovetail work, and portable curved cutting where control matters more than speed, nothing replaces a coping saw. If your work is exclusively fine detail in thin material at a bench, a fret saw’s deeper throat and finer blade may serve you better. If you need to cut large curved panels fast and precision isn’t critical, a jigsaw is faster. If you’re doing repetitive intricate scroll work in a shop setting, a scroll saw removes the hand fatigue entirely.
What to Look for in a Coping Saw
TPI (Teeth Per Inch) — Matched to the Task
TPI is the single most important spec for cut quality, and most buying guides list it without connecting it to real tasks. Here’s the practical breakdown:
| TPI Range | Cutting Speed | Best For |
|---|---|---|
| 10–15 TPI (coarse) | Fast | Quick waste removal, straightforward curves in softwood |
| 15–18 TPI (general purpose) | Moderate | Standard molding coping, general dovetail waste removal |
| 18–24+ TPI (fine) | Slow, precise | Tight scroll curves, thin material, fine detail and craft work |
A coarser blade removes material quickly but is harder to steer through a tight radius. A finer blade cuts slower but follows a tight curve far more accurately and leaves a cleaner edge in thin stock. If your kit includes multiple TPI options — as the KATA kit in this guide does — match the blade to the task rather than using one TPI for everything.
Blade Material
High-carbon steel blades are the standard for general wood cutting and are what most stock blades are made from. Bi-metal or 65Mn spring steel blades add flexibility and resistance to snapping under normal tension, which extends blade life meaningfully on repeated coping jobs. For non-wood material, tungsten-carbide-grit wire blades (a wire embedded with carbide grit rather than conventional teeth) can cut tile, glass, and ceramic — a specialty application most coping saw kits don’t include but worth knowing exists if your project calls for it.
Frame Throat Depth
The throat depth — the distance from the blade to the back of the frame — determines how far into a workpiece you can reach for an interior cut. A shallow-throat saw is perfectly adequate for coping molding profiles along an edge, where you’re never cutting more than an inch or two from the material’s edge. A deeper throat matters when you’re making interior cutouts well away from any edge — a design element in the center of a panel, for example. Check throat depth against your typical project needs before assuming any coping saw will reach far enough.
360° Blade Rotation
Better coping saws let you rotate the blade within the frame without repositioning the entire saw or your grip. This matters enormously when following a curved molding profile — instead of constantly repositioning your whole arm and the saw’s angle relative to the workpiece, you rotate just the blade to match the direction of the cut. This is a genuine time-saver and control improvement on any curved or profile-following cut.
Tensioning System
Most coping saws tension the blade via a thumbscrew or wingnut, typically at the handle end. Some designs — including the Stanley 15-106 in this guide — allow tensioning adjustment from both ends of the frame, which generally produces more even, consistent tension across the full blade length than a single-point adjustment.
Grip Material and Fatigue
A bare hardwood handle is traditional and perfectly functional, but on a multi-hour trim coping job — running crown molding through an entire house, for example — a cushioned TPR (thermoplastic rubber) or ProTouch-style grip noticeably reduces hand fatigue compared to bare wood. If your work involves extended coping sessions rather than occasional cuts, prioritize a soft-grip handle.
Replacement Blade Compatibility
Nearly all coping saws use a standard universal pin-end blade format, meaning replacement blades from any manufacturer will fit any frame. Confirm this before buying if you’re considering a saw with an unusual mounting system — sticking to the standard pin-end format keeps your future blade purchases simple and widely available.
The 5 Best Coping Saws (2026)
1. IRWIN Tools ProTouch Coping Saw (2014400) — Best Overall
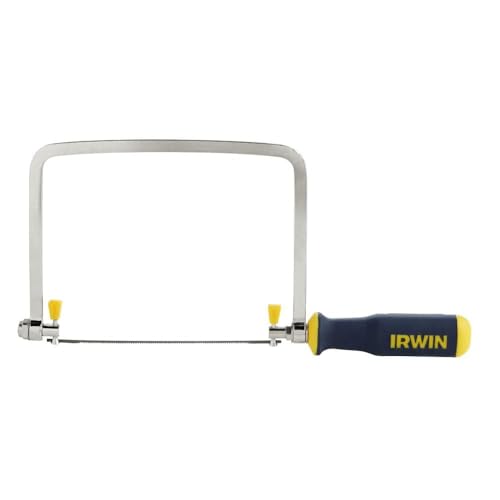
The IRWIN ProTouch earns the top spot in this guide by delivering the two features that matter most for real-world coping work: smooth, easy blade rotation and a grip that stays comfortable through extended use. The 360-degree blade rotation lets you reorient the blade mid-cut to follow a curved molding profile without repositioning your whole arm — a genuine control advantage when you’re carefully tracing a profile line on crown or base molding.

The cushioned ProTouch grip is the other standout feature — IRWIN’s soft-grip handle design significantly reduces hand fatigue compared to a bare hardwood handle, which matters considerably on a job coping an entire room’s worth of trim. The 6-1/2″ blade covers standard coping and dovetail work comfortably, and the frame accepts standard universal pin-end blades, so replacements are inexpensive and widely available from multiple manufacturers.

Blade tension adjusts via a thumbscrew at the handle, and while the stock blade is adequate for general use, most experienced users find upgrading to a higher-TPI blade improves fine scroll work noticeably — a simple, inexpensive swap given the standard blade format. For DIYers, trim carpenters, and anyone building out their first serious hand-tool kit, the combination of smooth rotation, comfortable grip, and wide part availability makes this the safest, best-performing all-around choice.
Pros
- 360° blade rotation for smooth profile-following on curved cuts
- Cushioned ProTouch grip significantly reduces hand fatigue
- Standard pin-end blade compatibility — inexpensive, widely available replacements
- Reliable thumbscrew tensioning
Cons
- Ships with only one stock blade — budget for spares
- Stock blade TPI is general-purpose; fine scroll work benefits from an upgrade
Specs
- Blade length: 6-1/2″
- Blade rotation: 360°
- Grip: Cushioned ProTouch
- Blade format: Standard universal pin-end
Best for: DIYers, trim carpenters, and woodworkers who want one reliable, comfortable coping saw that handles the majority of molding, dovetail, and curved-cut tasks.
2. JORGENSEN Pro Coping Saw — Best Value
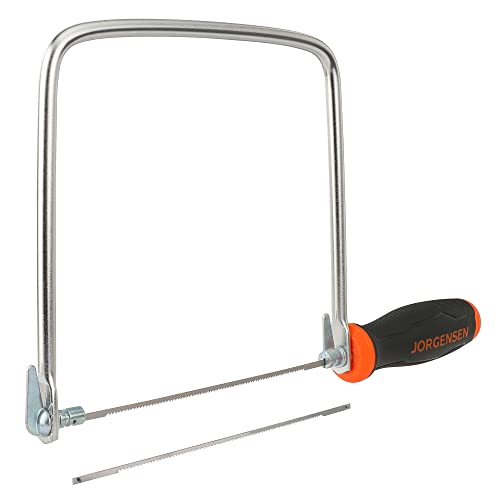
The JORGENSEN Pro Coping Saw delivers strong practical value by including two spare 6-1/2″ replacement blades alongside the stock-installed blade — a genuinely useful inclusion given that blades are a wear item and running out mid-project is a common frustration. Rather than needing an immediate separate blade purchase, you have backups ready from day one.

The rigid steel frame resists twisting under tension and during cutting, holding a consistent line through tighter turns better than flimsier budget frames that flex and let the blade wander off-line. In practical testing across pine and MDF moldings, this rigidity translates to noticeably less chatter and a cleaner, more controlled cut than looser frame designs at a similar price point.

The ergonomic handle provides a secure, comfortable grip for extended cutting sessions, and blade changes are quick thanks to a straightforward tensioning mechanism. The stock blade handles general-purpose coping and curve work well; for finer scroll detail, swapping in a higher-TPI blade is simple given the standard pin-end format. For anyone who wants strong frame rigidity and doesn’t want to think about blade replacements for a while, the included spares make this the strongest value pick in this guide.
Pros
- Two spare blades included — no immediate separate blade purchase needed
- Rigid steel frame resists twist and chatter on tighter curves
- Handles pine and MDF moldings cleanly without chatter
- Quick, straightforward blade changes
Cons
- Stock blade is general-purpose — fine scroll work benefits from a higher-TPI swap
- Handle comfort is solid but not as cushioned as the IRWIN ProTouch grip
Specs
- Blade length: 6-1/2″
- Blades included: 3 total (1 stock + 2 spare)
- Frame: Rigid steel
- Blade format: Standard universal pin-end
Best for: Buyers who want strong frame rigidity and ready spare blades without an immediate separate purchase, at a value-focused price.
3. Coping Saw Frame Set with 5 Replacement Blades for Wood, Metal & Plastic — Best Multi-Material Kit
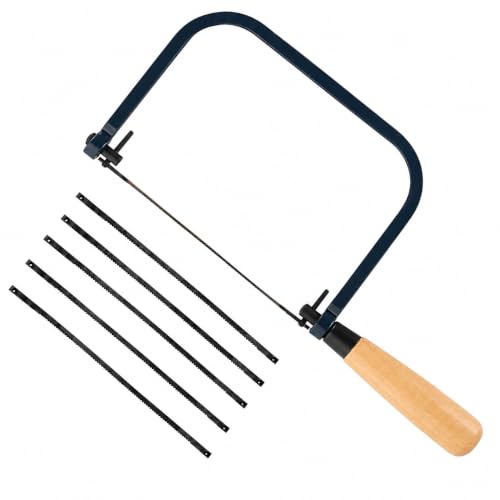
This kit stands apart by including five replacement blades spanning wood, metal, and plastic cutting applications in a single package — rather than buying a saw and then separately sourcing blades for each material you work with, this kit covers the range from the start. For anyone whose projects aren’t limited to wood — hobbyists working across mixed materials, makers building enclosures or fixtures that combine wood, thin metal, and plastic components — this variety eliminates a real friction point.

The frame itself uses a standard tensioning system and accepts universal pin-end blades, meaning the included variety pack isn’t a proprietary limitation — you can source additional blades in any TPI or material type as needed down the line. Each blade type in the kit is suited to its intended material: coarser, tougher blades for wood, finer high-carbon steel for thin metal, and appropriately toothed blades for plastic that won’t melt or grab the material aggressively.

For a maker or hobbyist who genuinely works across multiple material types rather than sticking exclusively to wood trim or furniture joinery, this kit removes the guesswork of matching the right blade to each material without researching and ordering separately. It’s a practical, ready-to-go solution for varied project work.
Pros
- Five blades covering wood, metal, and plastic in one kit
- Standard universal blade format — not locked into proprietary replacements
- Eliminates the need to separately source blades for different materials
- Practical for hobbyists and makers working across mixed material projects
Cons
- Frame itself is standard-grade rather than a premium design feature focus
- Buyers focused exclusively on wood trim work won’t use the full blade variety
Specs
- Blades included: 5, spanning wood/metal/plastic applications
- Blade format: Standard universal pin-end
- Frame: Standard tensioning system
Best for: Hobbyists and makers working across mixed materials — wood, thin metal, and plastic — who want blade variety included from the start.
4. KATA 6.5″ Coping Saw, Precision Woodworking & Craft Hand Saw — Best for Precision/Craft
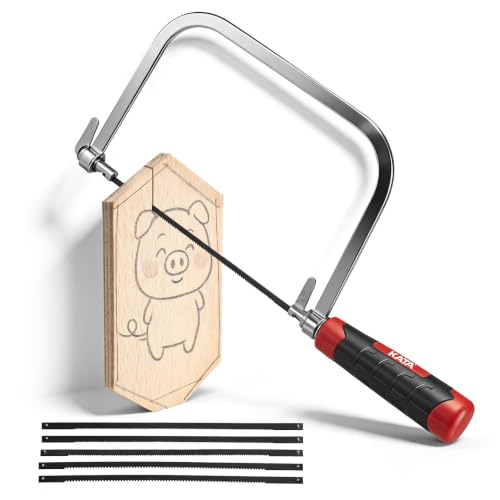
The KATA coping saw is purpose-built for detail-focused work, and its standout feature is including six blades across three distinct TPI ranges — 14, 18, and 24 TPI — giving you the exact tooth count matched to the task rather than compromising with a single general-purpose blade. Fine scroll work and tight curves genuinely benefit from a properly matched TPI, and having 24 TPI blades on hand for the tightest detail work is a meaningful advantage over kits that include only general-purpose blades.

The blades are made from 65Mn spring steel — a material chosen specifically for its combination of flexibility and durability under repeated tensioning and cutting stress, which resists snapping better than basic high-carbon steel under normal use. The TPR (thermoplastic rubber) grip provides genuine comfort for extended detail sessions, addressing the hand fatigue that a bare wood handle produces over hours of careful scroll or craft work.

For DIY craft projects, detailed scroll work, model making, and any application where precision and fine control matter more than raw cutting speed, the KATA’s combination of TPI variety, durable blade steel, and comfortable grip make it the standout choice in this guide. The 6.5″ blade length is standard and compatible with universal replacement blades beyond the included six.
Pros
- Six blades across three TPI ranges (14/18/24) matched to different cutting needs
- 65Mn spring steel blades resist snapping under normal tensioning stress
- TPR soft grip genuinely reduces fatigue on extended detail sessions
- Excellent for scroll work, craft projects, and fine detail cutting
Cons
- The variety of TPI options is most valuable to detail-focused users — general trim work doesn’t need three tooth counts
Specs
- Blade length: 6.5″
- Blades included: 6, in 14/18/24 TPI
- Blade material: 65Mn spring steel
- Grip: TPR soft grip
Best for: Hobbyists, craft makers, and woodworkers focused on scroll work and fine detail cutting who want precise TPI options matched to the task.
5. Stanley 15-106 Coping Saw (Pack of 6) — Best Bulk Pack for Trim Pros
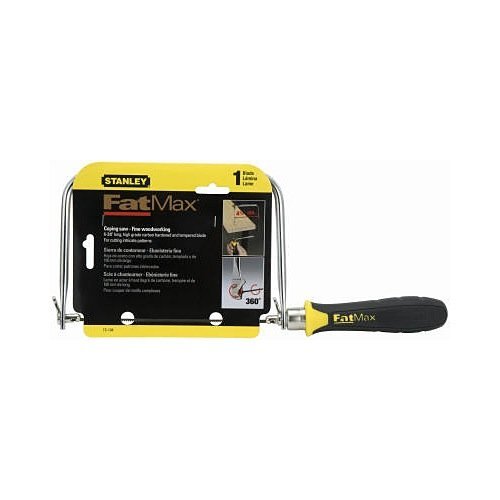
The Stanley 15-106 is sold as a pack of six complete saws — a format that makes sense specifically for trim carpentry crews, contractors outfitting multiple workers, or anyone who wants a spare saw on hand for every job without hunting down individual replacement units. Each saw features a 360-degree rotating blade for profile-following control, and a genuinely useful dual-side tensioning system — both the thumbscrew and the handle contribute to tensioning, which produces more even blade tension than a single adjustment point.

The saw supports both push and pull cutting motions, giving flexibility depending on the specific cut and material orientation, though the standard recommendation of orienting teeth to cut on the pull stroke still applies for most coping work. The hardwood handle is comfortable and durable, if not as cushioned as the ProTouch-style grips found on premium single-saw options — a reasonable trade-off given the pack format’s value-per-unit positioning.
The stock blade included with each saw is functional but modest — most users find upgrading to a higher-quality replacement blade meaningfully improves cut quality, and since replacement blades are inexpensive and widely available in the standard pin-end format, this is a simple and worthwhile upgrade. For trim carpentry businesses, job sites needing multiple saws on hand, or woodworking classrooms and shops equipping several workstations, the six-pack format delivers strong per-unit value.
Pros
- Pack of six complete saws — ideal for crews, classrooms, or multiple workstations
- 360° blade rotation on every saw in the pack
- Dual-side tensioning system for more even blade tension
- Durable hardwood handle; supports both push and pull cutting
Cons
- Stock blades are modest quality — budget for upgraded replacements
- Hardwood handle less cushioned than premium soft-grip options
Specs
- Blade length: 6-3/8″
- Frame depth: 6-3/4″
- Quantity: Pack of 6 saws
- Tensioning: Dual-side (thumbscrew + handle)
Best for: Trim carpentry crews, contractors, and shops or classrooms that need multiple coping saws on hand at strong per-unit value.
How to Cope a Molding Joint — Step by Step
Coping is the technique that gives the coping saw its name, and it’s the single most common professional use case — yet it’s rarely explained step by step anywhere. Here’s the full process for coping an inside corner joint on crown or base molding.
Step 1 — Cut the First Piece Square
Cut the first piece of molding with a standard square cut and install it running into the inside corner as normal, butted directly against the wall.
Step 2 — Miter the Second Piece
Cut the second piece of molding at a 45-degree inside miter, exactly as you would for a standard mitered inside corner. This miter cut reveals the molding’s decorative profile as an outline on the freshly cut face — this profile line is what you’ll follow with the coping saw.
Step 3 — Cope Along the Profile Line
Using the coping saw, carefully follow the profile outline revealed by the miter cut. The critical technique here: back-cut at a slight angle — roughly 5 degrees — behind the visible line rather than cutting straight through at 90 degrees. This back-cut angle undercuts the material so that only the front edge of the profile actually touches the mating piece of molding when the two pieces are joined, rather than the full cross-section. This is what allows a coped joint to close tightly even when the two pieces aren’t in perfectly identical planes.
Step 4 — Test-Fit and Refine
Test-fit the coped piece against a scrap of the same molding profile before installing. If there are high spots preventing a tight fit, pare them down carefully with a utility knife or a small rasp — small adjustments here make the difference between a visible gap and an invisible joint.
Why Coping Beats Mitering on Inside Corners
A mitered inside corner requires both walls to meet at a perfect 90-degree angle and both pieces of molding to stay perfectly stable — any wood movement from humidity changes, or any wall that’s slightly off-square (extremely common in real construction), opens a visible gap at the miter line. A coped joint tolerates these imperfections far better: because the coped piece’s profile is undercut and only the front edge makes contact, minor movement or a slightly-off wall angle doesn’t create the same visible separation. This is why professional trim carpenters cope inside corners almost universally rather than mitering them.
Setting Up Your Saw Correctly
Blade Orientation — Teeth Toward the Handle
Coping saw blades should be installed with the teeth pointing toward the handle, so the saw cuts on the pull stroke rather than the push stroke. This orientation improves control significantly — you’re pulling the thin blade taut through the cut rather than pushing it, which is inherently more stable for a thin blade under tension. It also reduces splintering on the visible face of the workpiece and reduces the chance of the blade buckling and snapping, which happens far more readily on a push stroke with a thin, flexible blade than on a controlled pull.
Proper Tension — The Ping Test
Nearly every coping saw guide tells you to “tension the blade” without explaining how much tension is correct or how to verify it. Here’s the practical test: tighten the tensioning thumbscrew until plucking the blade with a finger produces a clear, high-pitched “ping” — similar to plucking a taut guitar string. If the blade produces a dull thud or visibly flexes when plucked, it’s under-tensioned and will wander off your cutting line during use. If the blade feels rigid to the point that it’s difficult to pluck at all, or if it snaps shortly after starting a cut under normal pressure, it’s over-tensioned — ease off slightly. Getting this right takes a few tries when you’re new to the tool, but the ping test gives you a reliable, repeatable way to check.
Starting an Interior Cutout
This is the coping saw’s defining capability and the technique that separates it from every other handsaw: making a cut that starts in the middle of a workpiece with no accessible edge. Here’s how:
- Drill a small starter hole inside the waste area of your design — sized just large enough for the blade to pass through
- Loosen the tensioning thumbscrew and unclip one end of the blade from the frame
- Thread the loose end of the blade through the drilled hole from the back of the workpiece
- Re-clip the blade back onto the frame pin and re-tension using the ping test
- Cut your interior shape, working from the starter hole outward to complete the cutout
This technique is how coping saws produce interior cutouts in jewelry boxes, decorative panels, and fretwork — no other handsaw can start a cut this way without an accessible edge.
Common Mistakes and How to Fix Them
Blade Keeps Snapping
The most frequent cause is over-tensioning combined with pushing on the return stroke instead of pulling. Check that your teeth are oriented correctly (pointing toward the handle) and re-verify tension with the ping test — a blade that snaps even under light, correct-direction cutting pressure is almost always over-tensioned.
Cut Wanders Off the Line
This is typically caused by an under-tensioned blade flexing sideways under cutting pressure, or by forcing the saw through the material faster than the blade’s TPI can effectively clear waste. Slow your cutting pace and re-tension the blade using the ping test.
Splintering on the Exit or Back Face
Usually caused by incorrect blade orientation (cutting on the push stroke instead of the pull stroke) or by using too coarse a TPI for thin material. Check blade direction first, and consider a finer TPI blade if you’re consistently seeing splintering on thin stock.
Blade Binds Mid-Cut
Sawdust buildup inside the kerf is the common culprit, particularly in resinous softwoods that generate sticky dust. Periodically back the blade out of the cut slightly to clear accumulated dust before continuing.
Blade Replacement — When and How Often
A dull coping saw blade shows a few clear signs: noticeably increased cutting effort for the same material you were cutting easily before, a faint burning smell developing on wood as the dull teeth generate friction heat instead of cutting cleanly, and — if you inspect closely — visibly rounded or shiny tooth tips rather than sharp points.
Realistic blade life varies significantly by material: expect a blade to comfortably handle dozens of feet of cumulative cutting in softwood under normal use before performance noticeably declines. Hardwood and any metal cutting will wear a blade considerably faster. Because blades are inexpensive and the standard pin-end format fits virtually any coping saw frame, it’s worth keeping a small stock of spares on hand rather than trying to extend a dulling blade’s life through a project — a fresh blade makes a noticeable difference in both cut quality and the physical effort required.
Frequently Asked Questions
What is a coping saw used for?
A coping saw is a hand tool used for cutting tight curves, coping inside-corner molding joints, removing waste material from hand-cut dovetail joints, and making interior cutouts in wood, thin metal, or plastic. Its thin, replaceable, tensioned blade allows far more control on curved and profile-following cuts than a jigsaw or standard handsaw, and its ability to thread through a drilled hole lets it make interior cuts no other handsaw can.
What TPI blade should I use for crown molding?
15–18 TPI (general-purpose) is the right range for most crown molding coping work — fine enough to follow the profile accurately without being so slow that ordinary cuts take excessive time. For particularly intricate or detailed molding profiles, stepping up to an 18–24 TPI fine blade improves accuracy on the tightest curves at the cost of cutting speed.
Which way should the teeth face on a coping saw?
Teeth should point toward the handle, so the saw cuts on the pull stroke rather than the push stroke. This orientation improves control, reduces splintering on the visible face of the material, and significantly reduces the chance of the thin blade buckling and snapping under normal cutting pressure.
Can a coping saw cut metal?
Yes, with the correct blade. A fine-tooth, appropriately hardened blade can cut thin sheet metal, tin, aluminum, and copper effectively. Standard wood-cutting blades are not suited to metal — use a blade specifically rated for metal cutting, such as those included in multi-material kits like the Coping Saw Frame Set covered in this guide.
How do I know if my coping saw blade is tensioned correctly?
Use the ping test: pluck the blade with a finger. Properly tensioned, it should produce a clear, high-pitched “ping” similar to a taut guitar string. A dull thud or visible flex when plucked means the blade is under-tensioned and will wander during cutting. A blade that’s difficult to pluck at all, or that snaps quickly under normal cutting pressure, is over-tensioned.
What’s the difference between a coping saw and a fret saw?
A fret saw uses an even thinner blade and typically has a much deeper frame throat than a coping saw, allowing it to reach further into a workpiece for very fine detail work in thin material — marquetry, jewelry, and intricate scroll patterns. A coping saw’s thicker, more rigid blade is better suited to coping molding profiles and removing dovetail waste in thicker stock, where a fret saw’s thin blade would lack sufficient rigidity.
Can I use a coping saw for dovetail joints?
Yes — a coping saw is a standard hand-tool method for removing the waste material between dovetail pins and tails after the angled cuts have been made with a dovetail or backsaw. The coping saw’s thin blade lets you cut close to the baseline without touching the finished dovetail surfaces, which are then cleaned up with a chisel.
How do I cut an interior hole with a coping saw?
Drill a small starter hole within the waste area of your design, unclip one end of the coping saw blade from the frame, thread the loose end through the drilled hole from the back of the workpiece, re-clip the blade onto the frame, and re-tension it using the ping test before cutting your interior shape. This is the coping saw’s signature capability — no other handsaw can start a cut without an accessible edge this way.
Final Verdict
The right coping saw depends on your project type and how much blade variety or bulk quantity you need. Here are the clear picks by buyer type:
- Best overall: IRWIN ProTouch 2014400 — smooth 360° rotation and a genuinely comfortable cushioned grip for extended work.
- Best value: JORGENSEN Pro Coping Saw — rigid frame with two spare blades included from the start.
- Best multi-material kit: Coping Saw Frame Set — five blades spanning wood, metal, and plastic in one purchase.
- Best for precision and craft work: KATA 6.5″ Coping Saw — three TPI ranges, durable 65Mn steel blades, and a genuinely comfortable TPR grip.
- Best bulk pack for trim pros: Stanley 15-106 (Pack of 6) — six complete saws with dual-side tensioning, ideal for crews and shops.
Whichever saw you choose, the blade you install and how you tension it matter more than the frame itself — orient the teeth toward the handle, tension until you get a clean ping, and match your TPI to the task. Get those three things right and any saw on this list will give you clean, accurate cuts.


