Your impact wrench is rattling at full power, the socket is seated on the lug nut, and nothing happens. The wheel nut does not move, not even a fraction. That does not always mean the impact wrench is broken. More often, the tool is being limited by its power source, socket choice, operating mode, or a lug nut that has been overtightened or seized by corrosion. A lug nut tightened to the vehicle’s recommended torque can need substantially more force to break loose later, rust, corrosion, damaged threads, and over-tightening with a shop impact gun can raise the breakaway torque well above the original installation torque.
Quick answer: Your impact wrench may not remove lug nuts because it does not have enough real breakaway torque, the battery is weak, the air supply is restricted, the tool is set to the wrong mode or direction, the socket is incorrect, or the lug nuts are overtightened or rust-seized. First confirm you are using a fully charged battery or adequate air supply, a six-point impact socket, reverse mode, and a wrench rated for lug-nut removal. If the nut still will not move, use a breaker bar or seek professional help rather than forcing damaged equipment.
Quick Diagnostic Table
| Symptom | Most Likely Cause | First Thing to Check | Likely Fix |
|---|---|---|---|
| Tool spins but barely hammers | Weak battery, low air pressure, power issue | Battery charge, charger status, compressor pressure | Recharge, use a higher-output battery, correct the air setup |
| Tool rattles but lug nut won’t move | Insufficient breakaway torque or seized lug nut | Tool’s actual removal torque and lug condition | Use a larger 1/2-inch impact wrench or breaker bar |
| Removes other bolts but not lug nuts | Lug nuts overtightened, corroded, or shop-installed | Compare fastener condition to other bolts | Penetrating oil where appropriate; breaker bar; professional removal |
| Socket slips or feels loose | Wrong socket size, worn socket, swollen lug nut | Fit of socket and lug-nut shape | Use the correct six-point impact socket or extractor |
| Tool does nothing after trigger pull | Wrong direction, low battery, fault | Reverse selector and battery seating | Set to reverse; charge or replace battery; consult manual |
| Air impact wrench feels weak | Compressor, hose, coupler, or regulator restriction | PSI at tool under load and hose diameter | Correct hose/regulator setup; drain tank; improve air delivery |
| Nut starts moving then stops | Socket rounding, nut damaged, tool overheating | Lug-nut corners and socket engagement | Stop; use correct socket or extractor; avoid further damage |
| Lugs were recently installed by a tire shop | Overtightening | Vehicle torque spec and removal resistance | Breaker bar or professional assistance; re-torque correctly after |
| Wheel lock won’t come off | Wrong key, damaged key, seized lock | Confirm key fit and condition | Use proper wheel-lock removal method or a professional |
Safety Before Troubleshooting
- Park on level, solid ground.
- Put an automatic vehicle in Park; a manual vehicle in gear.
- Apply the parking brake.
- Chock the wheel opposite the one being worked on when appropriate.
- Loosen lug nuts while the wheel is still on the ground.
- Do not use an impact wrench to lift, support, or stabilize a vehicle.
- Never work under a vehicle supported only by a floor jack.
- Use properly rated jack stands if the vehicle must be raised.
- Wear safety glasses when using impact tools, breaker bars, extractors, or penetrating products.
- Keep hands, sleeves, and hair away from rotating tools.
- Do not use a chrome hand socket on an impact wrench, use an impact-rated socket. See our full breakdown on impact sockets vs. regular sockets.
- Stop if the lug nut begins rounding, the socket starts slipping, or the wheel-lock key deforms.
Do not use an impact wrench for final lug-nut torque. Use the impact tool to remove nuts or run them down lightly; finish tightening with a calibrated torque wrench to the vehicle manufacturer’s specification, using the correct pattern.
Cause 1: Your Tool Is Too Small or Lacks Breakaway Torque

“Max torque” is often a marketing number, and fastening torque isn’t the same as nut-busting or breakaway torque. An impact driver with a 1/4-inch hex collet is not the same tool as an impact wrench with a square-drive anvil. Compact 3/8-inch impact wrenches can be excellent for medium-duty mechanical work but may struggle with lug nuts, especially fasteners installed with a pneumatic wrench or ones that have seized. A capable 1/2-inch impact wrench is the most common format for passenger-car wheel work.
Ask yourself: Is it an impact driver or an impact wrench? Does it have a 1/4-inch hex chuck, 3/8-inch square drive, or 1/2-inch square drive? What is the manufacturer’s stated breakaway or nut-busting torque, and was that rating measured under ideal conditions? Does your vehicle have large truck, SUV, van, or aftermarket wheel fasteners? Were the lug nuts last tightened at a tire shop with an air gun?
For normal passenger-car work, use a reputable 1/2-inch-drive impact wrench suited to wheel fasteners, and keep a breaker bar as backup even if you own a powerful impact wrench. Don’t buy solely based on a huge advertised torque number, check drive size, battery platform, and credible test data instead. If your current tool is a compact 3/8-inch model or a 1/4-inch impact driver, see our guide to the best cordless impact wrenches before buying an upgrade.
Cause 2: The Battery Is Weak, Cold, or Mismatched

A cordless impact wrench may power on and still perform poorly. A weak battery can allow the motor to spin but reduce the energy available for repeated hammering impacts, this can happen with a battery that appears charged but is old or degraded, a small-capacity pack sagging under heavy demand, a very cold battery, dirty contacts, or a tool stuck in an energy-saving mode.
| Check | What to Do |
|---|---|
| Battery is low | Fully charge it using the correct charger |
| Battery is cold | Warm it indoors; never with a flame, heater, or direct high heat |
| Battery is old or weak | Test with a known-good pack; replace if performance stays poor |
| Contacts are dirty | Remove battery and clean contacts gently with a dry cloth |
| Tool is in low-power mode | Select the manufacturer’s recommended removal or high-power mode |
| Battery is undersized | Use the capacity recommended by the tool manufacturer for heavy-duty work |
A larger Ah battery doesn’t automatically raise torque output, the exact effect depends on the specific battery, tool, and platform, but a genuinely weak or degraded battery is a real, common, and easy-to-rule-out cause.
Cause 3: The Impact Wrench Is Set Incorrectly

A quick-win check before you buy anything: confirm the direction selector is set to reverse, not forward. Check that you’re not just feathering the variable-speed trigger, that the tool isn’t in a low-power or precision mode, and that the socket is fully seated and held square to the lug nut rather than at an angle.
- Confirm the tool is in reverse.
- Use a correctly sized impact-rated socket.
- Seat the socket fully over the lug nut.
- Hold the tool square to the fastener.
- Use firm, controlled pressure to keep the socket engaged.
- Apply full trigger power in short, controlled bursts.
- If nothing changes after several seconds, stop and diagnose rather than hammering endlessly.
Cause 4: You Are Using the Wrong Socket

The socket must match the lug nut exactly. Use a six-point impact socket for standard hex lug nuts, never a regular chrome socket, and avoid an oversized socket that “almost fits.” Some factory lug nuts have decorative caps that swell, deform, or separate over time, and a nominally correct socket may not seat on one. Wheel locks require the correct key, don’t force a standard socket onto a lock.
| Lug-Nut Issue | What You May See | Best Next Step |
|---|---|---|
| Wrong socket size | Socket rocks or slips | Verify exact size; use six-point impact socket |
| Swollen capped lug nut | Socket won’t seat fully | Use the correct specialty socket or replace damaged lug nuts |
| Rounded lug nut | Corners are damaged | Stop before worsening it; use an extractor or professional removal |
| Wheel lock | Standard socket doesn’t fit | Use correct wheel-lock key |
| Deep/recessed lug nut | Standard socket can’t reach | Use a deep or thin-wall impact socket |
Metric and SAE sockets can sometimes feel close enough to fit but still damage a lug nut. If the socket doesn’t seat fully and tightly, stop and verify the correct size before applying power. Read our full guide on impact sockets vs. regular sockets before using any socket on an impact wrench.
Cause 5: Air Supply Is Choking a Pneumatic Impact Wrench
This cause only applies to air-powered tools. An air impact wrench can feel weak even when the compressor gauge looks correct, the actual issue may be pressure or volume loss between the compressor and the tool: not enough tank pressure, a compressor that can’t maintain required CFM while running, a hose that’s too narrow or too long, restrictive fittings, a regulator set too low, water in the line, or a tool that needs lubrication.
| Check | Symptom | Fix |
|---|---|---|
| PSI at the tool | Tool sounds weak under load | Set regulator to manufacturer specification |
| Compressor CFM | Tool works briefly then loses power | Use a compressor that can sustain the tool’s CFM demand |
| Hose diameter | Tool is sluggish despite tank pressure | Use a suitable diameter and minimize excessive length |
| Couplers and fittings | Airflow feels restricted | Use high-flow fittings where appropriate |
| Tank moisture | Water sprays or performance varies | Drain tank and use moisture control |
| Tool lubrication | Tool sounds dry or sluggish | Follow manufacturer lubrication instructions |
There’s no single universal PSI or CFM number that applies to every tool, check your specific impact wrench’s manual for its actual requirement.
Cause 6: The Lug Nuts Are Overtightened

Lug nuts should be tightened to the vehicle manufacturer’s specified torque, but some tire shops use pneumatic impact tools for speed without verifying final torque with a torque wrench. A lug nut tightened with too much force can need far more breakaway force to remove later, and removal torque isn’t a reliable measure of original installation torque, since corrosion, friction, and thread condition all change it over time. Passenger vehicles commonly have lug-nut specifications around 80-120 ft-lb, but corrosion or overtightening can push actual breakaway force well beyond that, always check your vehicle’s owner’s manual for the exact spec rather than relying on a generic number.
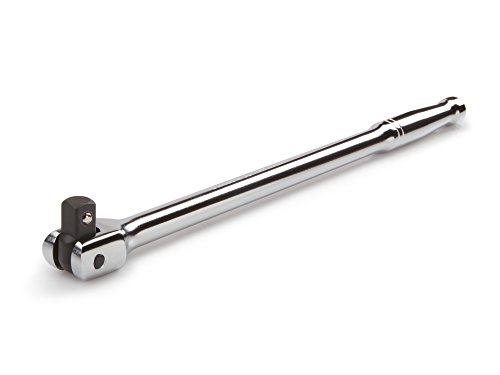
Don’t keep hammering with a too-small impact wrench. Keep the wheel on the ground, use a correct six-point impact socket, and try a properly sized breaker bar with smooth, controlled force, never a violent bounce. TEKTON’s flex-head breaker bar pivots 180 degrees for awkward angles and uses a spring-loaded ball bearing to retain the socket securely while you apply leverage.
Pros: Genuine flex head for tight or awkward angles; chrome-moly construction built for real leverage; spring-loaded retention keeps the socket from dropping mid-job.
Cons: A breaker bar only works safely with controlled technique, don’t stand on it or add a cheater pipe.
If the nut still won’t move or begins rounding, stop and seek a tire shop or mechanic rather than risking damage to the wheel, studs, or wheel locks. After reinstalling the wheel, hand-start all lug nuts and final-torque them to spec in the correct sequence.
Never stand on a breaker bar or use a cheater pipe as a general fix. Those techniques risk falls, broken tools, damaged wheel studs, and injury.
Cause 7: The Lug Nut Is Rusted, Corroded, or Seized
Common culprits include rust on exposed wheel studs, corrosion between the lug nut and wheel, road salt exposure, damaged plating, galvanic corrosion between certain wheel and fastener combinations, and decorative lug-nut caps that trap moisture. Watch for orange rust on studs, flaking or swollen caps, a nut turning unevenly or binding, cracking sounds, a wheel-lock key twisting, or a nut that starts to round before it moves.
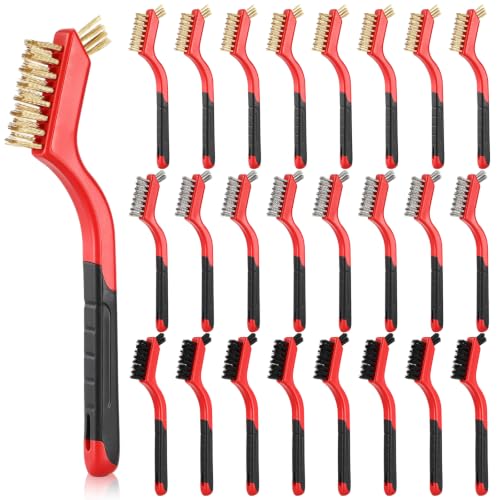
Clean accessible external corrosion with a wire brush first, avoid damaging the threads themselves. A set with stainless, brass, and nylon bristles lets you match the brush to the surface, stainless for heavy rust, brass for unfinished metal without gouging, nylon for anything you don’t want to scratch.
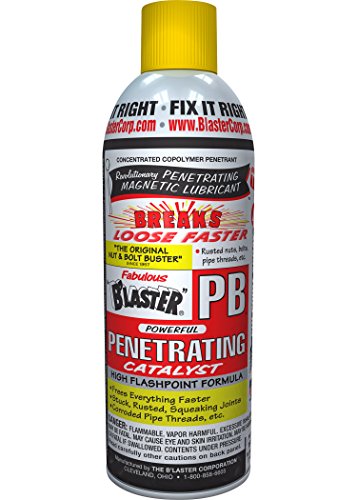
Apply penetrating oil only where it can reach the thread area, following the product’s directions, and allow adequate dwell time before attempting removal. Never spray penetrating products onto brake rotors, pads, or other friction surfaces.
If the lug nut is rounded, swollen, cross-threaded, or still won’t release after cleaning and penetrating oil, stop using the ill-fitting socket, continued use will worsen a rounded fastener and make removal harder.
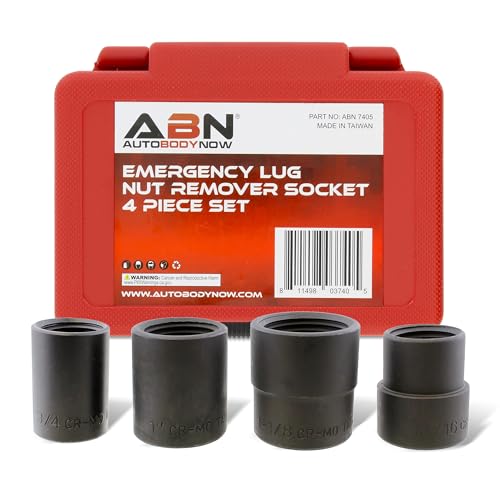
A dedicated extractor set uses deep internal reverse threads to grip a stripped or rounded nut that a standard socket can no longer engage. Note that the removal action typically distorts the nut, plan to replace it afterward rather than reuse it.
Pros: Genuinely designed for nuts already too damaged for a standard socket; covers the common SAE lug nut sizes; works with a standard 1/2-inch impact wrench or ratchet.
Cons: The extraction process damages the nut by design, budget for replacement lug nuts afterward.
Cause 8: The Wheel Lock or Capped Lug Nut Is the Real Problem
If your wheels use locking lug nuts, confirm you’re using the correct key, inspect it for cracks, twisting, or stripped teeth, and seat it completely before applying force. Don’t use an impact tool on a wheel-lock key unless its maker explicitly permits it.
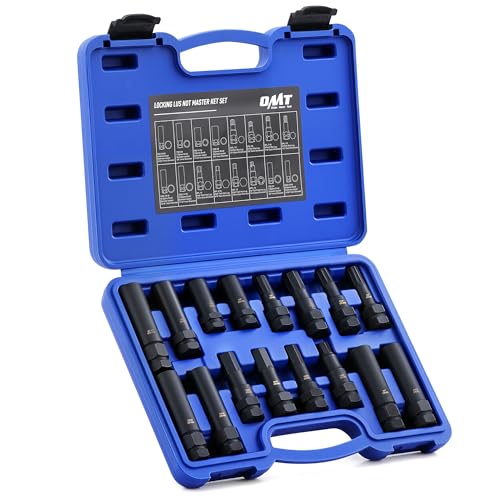
If the original key is missing or damaged, a master key set covering common spline patterns (5, 6, 7, and 12-spline, plus spike styles) can get a legitimate wheel lock off without waiting for a locksmith or dealer.
Pros: Covers the common spline patterns used across most aftermarket wheel locks; SAE 1/2-inch drive works directly with a standard impact wrench or ratchet; heat-treated Cr-Mo construction.
Cons: Won’t cover every proprietary pattern, if your specific lock isn’t a common spline type, professional removal may still be necessary.
For capped lug nuts specifically: some have a thin decorative cap over a smaller structural nut, and caps can swell or distort from corrosion or repeated tool use. A nominally correct socket may not seat, use a replacement solution appropriate to the fastener rather than forcing a loose-fitting socket, and replace damaged capped lug nuts as a full set where appropriate.
Cause 9: The Impact Wrench Itself Has a Fault
Save this diagnosis for last, after you’ve ruled out power source and setup issues. Watch for a motor that spins with weak or absent hammering action, a burning smell, smoke, unusual grinding, a trigger that cuts in and out, a battery that overheats immediately, excessive play in the gearbox or anvil, or a corded tool that trips the breaker.
Stop using the tool immediately if you smell burning, see smoke, or hear internal grinding. Check the manual for diagnostic lights or error codes, inspect for a damaged anvil, cracked housing, loose battery connection, or air leak, and use manufacturer service or warranty support rather than disassembling the impact mechanism yourself unless you have the manual, correct parts, and real experience.
Step-by-Step Diagnostic Process
Step 1, keep the vehicle safely on the ground. Confirm parking brake, gear/Park, stable surface, and wheel chocks. Don’t raise the vehicle until lug nuts are loosened.
Step 2, confirm the socket. Use the exact-size six-point impact socket, seated fully and squarely on the lug nut.
Step 3, confirm reverse mode. Check the forward/reverse selector against your manual.
Step 4, confirm the power source. Cordless: fully charged, properly seated, known-good battery. Air: correct pressure at the tool, adequate compressor output, good hose and fittings. Corded: appropriate extension cord and a reliable outlet.
Step 5, use proper technique. Hold the tool straight, keep firm pressure toward the wheel, use controlled full-power bursts.
Step 6, reassess after a few attempts. Don’t let the tool hammer indefinitely. Check for overtightening, corrosion, or a tool too small for the job.
Step 7, move to the breaker-bar fallback. Use a properly sized breaker bar and six-point socket, wheel still on the ground, gradual force, stop if the fastener rounds.
Step 8, escalate appropriately. Call a professional if a lug nut is rounded or cross-threaded, a wheel-lock key is damaged or missing, a stud appears to twist or stretch, the wheel is alloy and damage risk is high, the nut won’t loosen with proper hand tools, you’re on the roadside without safe equipment, or you suspect a previous service severely overtightened the wheel.
If the vehicle does need to come off the ground for further work, use a properly rated jack and stands, never a floor jack alone.

A combo set covering both the lift and the support in one purchase is a sensible starting point if you don’t already own either.
Pros: Covers both tools you actually need in one purchase; low-profile design fits under most passenger vehicles; rapid-pump quick lift saves real time.
Cons: Entry-tier jack stands in a combo kit are usually lighter-duty than a dedicated premium pair, fine for occasional use, less ideal for frequent heavy work.
If you already have a jack and just need stands, a dedicated pair gives you a choice by budget and duty cycle:

YELLOW JACKET’s stands add a double safety mechanism, both a ratcheting locking bar and a metal safety pin, plus a wide pyramid foot base for real stability under an SUV.
Pros: Double-locking safety mechanism beyond a single ratchet; wide base improves stability; rated for SUVs, not just sedans.
Cons: Priced above a basic pair, worth it specifically if you value the redundant locking mechanism.

For occasional sedan and light SUV work, a simpler self-locking ratchet pair covers the basics without paying for features you may not need.
Pros: Genuinely budget-friendly; self-locking ratchet needs no separate key; meets ASME safety standard for portable automotive service equipment.
Cons: Rated for sedans and urban SUVs specifically, not heavier trucks, check capacity against your actual vehicle.
Impact Wrench vs. Breaker Bar for Stuck Lug Nuts
| Tool | Best Use | Strength | Limitation |
|---|---|---|---|
| Cordless impact wrench | Fast removal of normal wheel fasteners | Convenient, fast, low effort | May lack breakaway force for seized or overtightened lugs |
| Pneumatic impact wrench | Frequent shop use, heavy-duty work | High sustained performance with adequate air supply | Requires compressor, hose, correct CFM, and fittings |
| Breaker bar | Stuck, overtightened, or rusted lug nuts | Direct leverage, controlled force | Requires physical effort and careful technique |
| Torque wrench | Final installation torque | Accurate final tightening | Not for breaking seized fasteners loose |
| Lug wrench | Emergency roadside wheel work | Portable, often included with the vehicle | Limited leverage and comfort |
The best setup for a home mechanic is often both: an impact wrench for fast removal and a breaker bar for the occasional seized lug nut. A torque wrench is a separate must-have for correct reinstallation, never use an impact wrench for final tightening.
What Not to Do
- Don’t use a regular chrome socket on an impact wrench.
- Don’t use an impact driver with a socket adapter as if it were a full-size impact wrench for stubborn lug nuts.
- Don’t continue if the socket is slipping.
- Don’t use an adjustable wrench on lug nuts.
- Don’t use an oversized SAE or metric socket that “almost fits.”
- Don’t final-tighten wheel nuts with an impact wrench.
- Don’t remove lug nuts after lifting the vehicle if you haven’t first broken them loose.
- Don’t crawl under a vehicle supported only by a floor jack.
- Don’t let penetrating oil or lubricants contact brake friction surfaces.
- Don’t force a damaged wheel-lock key.
- Don’t keep hammering on a lug nut for minutes when it’s clearly seized.
- Don’t use damaged sockets, cracked extensions, or worn adapters.
- Don’t rely on generic torque numbers, use your vehicle’s manual.
Frequently Asked Questions
Why does my impact wrench run but not remove lug nuts?
The tool may lack enough breakaway torque, have a weak battery or poor air supply, be set incorrectly, use the wrong socket, or be fighting overtightened or corroded lug nuts. Check the power source, reverse setting, socket fit, and tool size before trying a breaker bar.
Can a 3/8-inch impact wrench remove lug nuts?
Some 3/8-inch impact wrenches can remove properly torqued lug nuts, but compact models may not have enough breakaway torque for overtightened, rusted, or shop-installed wheel fasteners. A 1/2-inch impact wrench is generally the more practical format for routine wheel work.
Can an impact driver remove lug nuts?
A 1/4-inch-hex impact driver is intended primarily for screws and smaller fasteners. It may remove some lightly tightened lug nuts with an adapter, but it shouldn’t be relied on as the primary tool for vehicle wheel removal, use a properly rated impact wrench instead.
Why will my impact wrench remove bolts but not lug nuts?
Lug nuts may have much higher breakaway resistance because of over-tightening, corrosion, road salt, seized threads, or the use of a pneumatic impact gun during installation. A nut can require more force to remove than its original tightening specification suggests.
What socket should I use with an impact wrench for lug nuts?
Use an exact-size, six-point impact-rated socket. Never use a regular chrome hand socket with an impact wrench, it isn’t designed for repeated impact loading.
Should I loosen lug nuts before jacking up the car?
Yes. Break lug nuts loose while the wheel is still on the ground, with the parking brake applied and the vehicle secured. Raise the vehicle only after the lug nuts have been loosened.
Can I use a breaker bar if my impact wrench won’t remove the lug nut?
Yes, a breaker bar is a common backup for stubborn lug nuts. Use the correct socket, keep the wheel on the ground, apply controlled force, and stop if the lug nut starts rounding or the setup becomes unsafe.
Should I use an impact wrench to tighten lug nuts?
Use an impact wrench only to run lug nuts down lightly if needed. Final tightening should be completed with a calibrated torque wrench set to the vehicle manufacturer’s specification.
This guide is general information. Always follow your vehicle and tool manufacturer’s instructions, and use your vehicle’s specific torque specification rather than a generic number.
Just starting your home garage from scratch? See our guide to the best mechanic tool set for beginners before you buy tools one at a time.