Understanding the different types of power sanders and their uses is valuable information for any craftsman, from aspiring DIYers to professional woodworkers. Whether you’re refinishing furniture, restoring antiques, or repainting your kitchen cabinets, knowing the types of power wood sanders will help you decide which sander is best for your project. This guide will lay out the most commonly used power sanders and explain their uses, cost, and what you shouldn’t use them for.
Choosing the Right Sandpaper
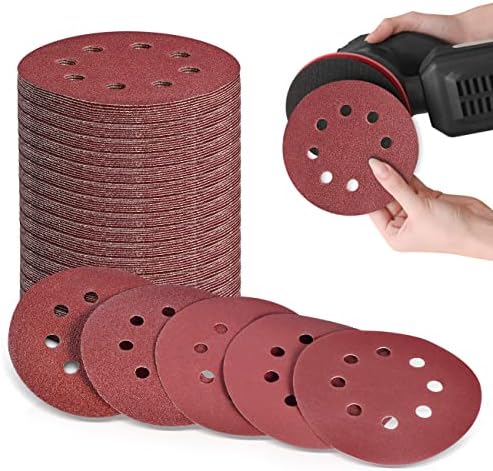
As important as choosing the right sander for the job is knowing how to choose the right sandpaper. Each sander on the list below utilizes a specific type of paper and will not work properly with the wrong type. When buying sandpaper, pay attention to the type of sander it fits as well as the size.
Sandpaper Types
- Hook and Loop: Commonly used with random-orbit sanders.
- Adhesive-Backed: Suitable for sheet sanders.
- Belt Sandpaper: Fits belt sanders.
Choosing Sandpaper Grits
Once you find the right sandpaper for your sander, you must decide which sandpaper grit to use. A sandpaper’s grit measures how coarse or fine the sandpaper is based on a number rating. The higher the number, the finer the sandpaper is. This is important, as coarser sandpaper cuts more aggressively and leaves highly visible sanding marks, while finer sandpaper cuts less aggressively and leaves less visible sanding marks.
Common Sandpaper Grits
| Grit Number | Use Case |
|---|---|
| 40-60 | Heavy material removal, rough shaping |
| 80-120 | General sanding, surface preparation |
| 150-180 | Fine sanding before finishing |
| 220-320 | Between coats of finish, polishing |
To use sandpaper grits effectively, we recommend progressing through at least three grits before finishing your project. Each grit progression will smooth the sanding marks left by the previous grit. While each project calls for a different starting grit, 120-grit sandpaper is good for general sanding. From there, you can decide to go lower or higher.
Just because a sandpaper grit is the same, doesn’t mean it will cut the same from sander to sander. For instance, 120-grit sandpaper will cut far more aggressively on a belt sander than it will on a random-orbit sander.
How Sandpaper Works
Regardless of whether you are hand-sanding, using a power sander, or utilizing coarse versus fine sandpaper, all sandpaper works similarly. The grit comprises abrasive particles attached to a backer, often made from paper or cloth. Each abrasive particle makes a cut as the sandpaper moves on the material’s surface. The sandpaper grit number determines the number and depth of these cuts. Finer sandpaper grits make cuts hardly visible to the naked eye, while coarser grits leave deep gouges.
The sanding process typically involves starting with lower grits and advancing to higher grits. Each increasing grit number smooths the scratches left by the previous grit, resulting in a surface that is smooth to the touch and free of visible scratches.
How to Choose the Right Sandpaper Grit
Choosing the right sandpaper grit depends on your project, material, and what you need the sandpaper to accomplish. You will likely need to use several incremental grits.
For example, when refinishing a piece of wood furniture, start with a coarse grit like 80 to remove the finish and smooth imperfections. Next, advance to a finer grit like 100 or 120 to smooth the scratches left by the 80-grit sandpaper. From there, your next grit will be determined by your finish. If you plan to paint the piece or apply a film finish such as polyurethane, it is likely ready to go. If you plan to apply a penetrating finish like a stain or penetrating oil, advance to 150 to 220 grits.
Consider the Wood Finish
For wood projects, the right sandpaper grit or set of incremental grits is determined by the nature of the finishes themselves. Finishes that sit on the wood’s surface (paint, polyurethane, lacquer, etc.) hide the fine scratches left by 120-grit sandpaper. However, penetrating finishes (stain, Danish oil, penetrating oil, etc.) soak into the scratches, highlighting their visibility.
Starting with too high of a grit will result in wasted time and effort. Additionally, you will burn through sandpaper quickly trying to remove finishes or smooth rough material with higher-grit sandpaper. However, starting with too low of a grit can damage your project in a way that is hard or impossible to undo. For example, you can quickly ruin wood details on furniture by eating through them with coarse sandpaper.
120-grit sandpaper is often a good place to start if you are unsure what sandpaper grit you should use. It is a general-purpose grit that will be a good indicator of whether you need to revert to a coarser grit or can advance to a higher grit.
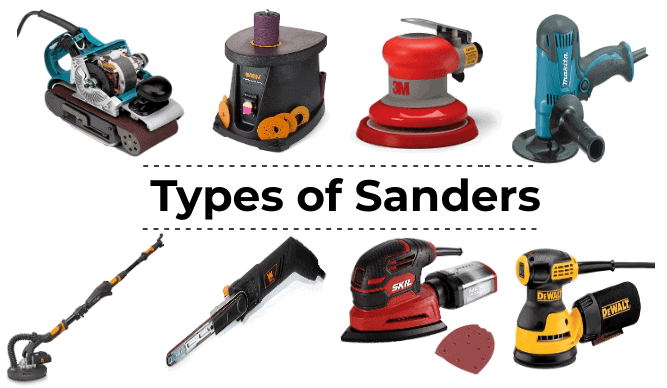
Types of Sanders
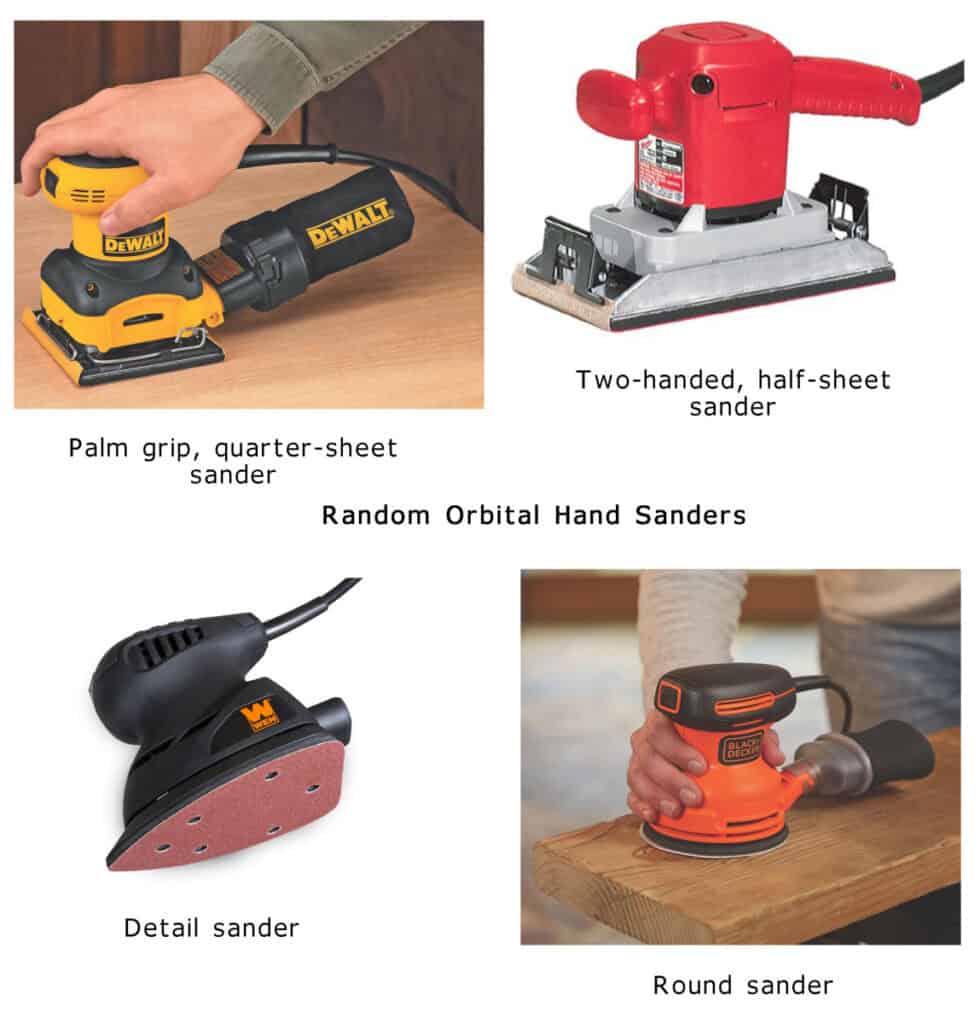
Random-Orbit Sander
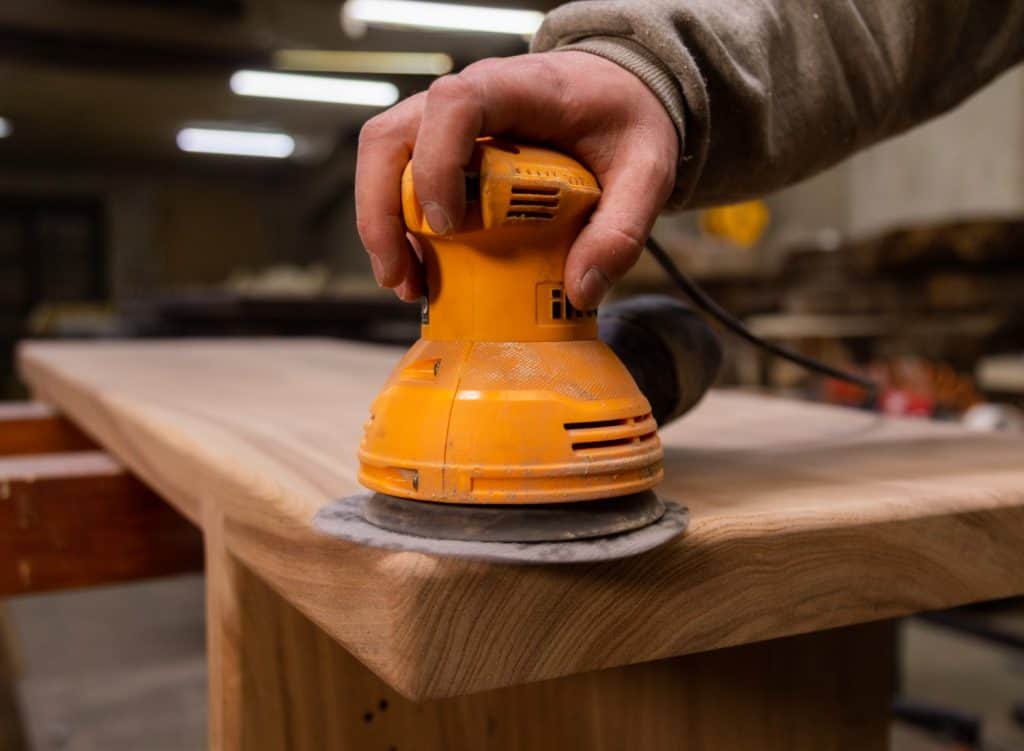
Best for: Wood finishing, metal sanding, and general sanding
Cost: $30 to $150
Random-orbit sanders are arguably the most popular type of sander. In fact, if you’ve done any DIY projects, you likely already own a random-orbit sander. They get their name from their motion, as the sanding surface has an intentionally random movement. This helps prevent visible sanding marks, which is of great value when sanding in preparation for finishing wood. This forgiving nature makes random-orbit sanders perfect for beginners who may not have proper sanding techniques down just yet. However, when using aggressive grits like 40 and 80, random-orbit sanders can easily leave grooves on wood surfaces if not operated perfectly flat on the work surface.
1/4-Sheet Orbital Sander
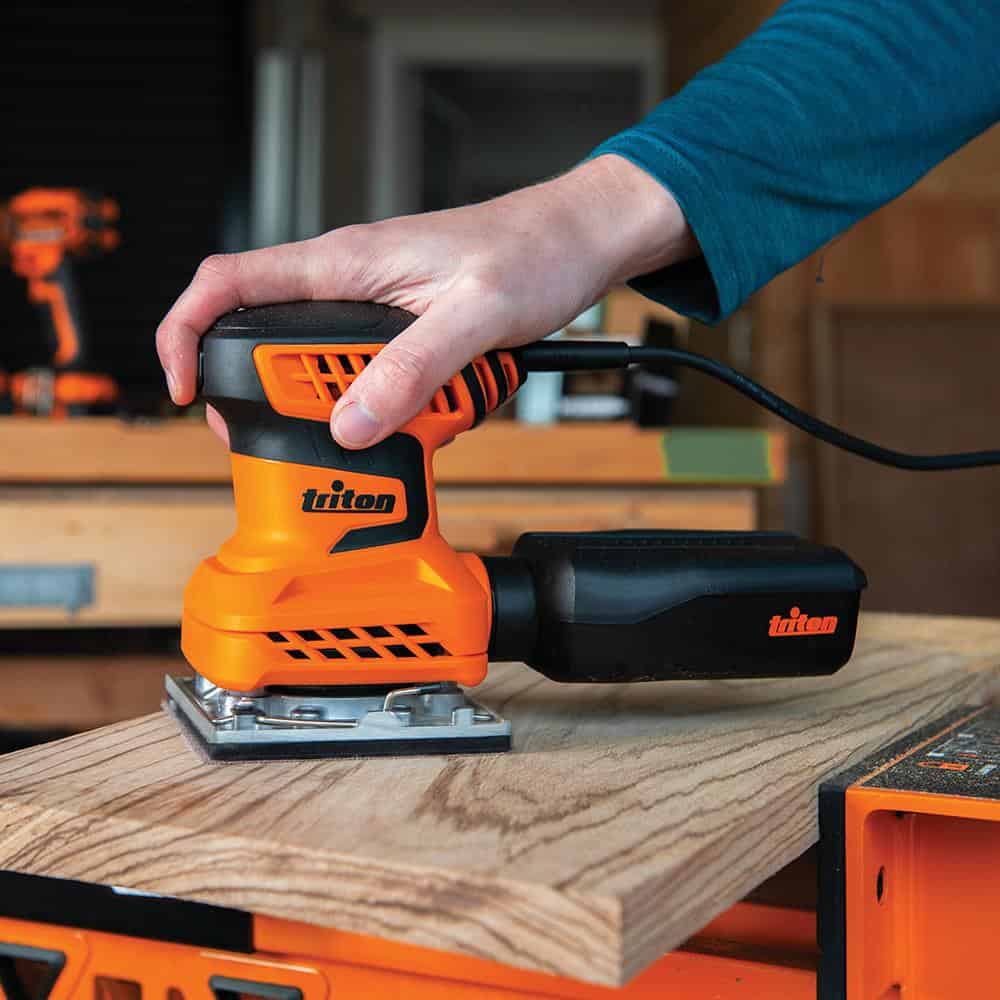
Best for: Wood finishing, general sanding
Cost: $30 to $150
1/4-sheet orbital sanders look a lot like a random-orbit sander, but the main difference lies in the sanding surface itself. Rather than a circular sanding pad, 1/4-sheet sanders fit a square sheet of paper. The shape and the name “1/4-sheet” comes from the fact that these sanders are designed to use 1/4 of a standard 9×11 sheet of sandpaper. The other difference is in the movement of the head, which ditches the “random” aspect of the random-orbit sander, simply moving in a tight orbital vibration. This means 1/4-sheet orbital sanders are more likely to leave sanding marks, especially when operated against the wood’s grain. Because of its one-handed operation, many people simply call a 1/4-sheet sander a palm sander.
1/2-Sheet Orbital Sander
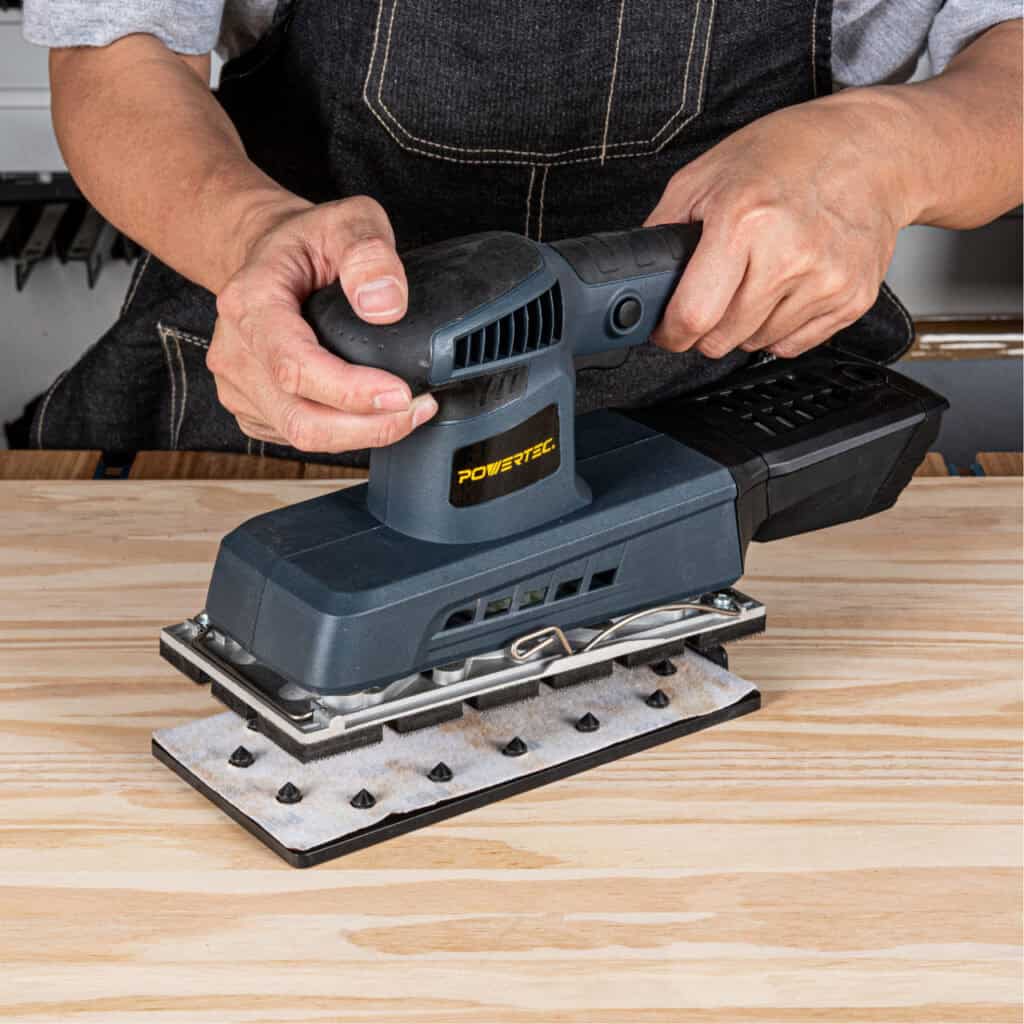
Best for: Wood finishing, general sanding
Cost: $50 to $400
You guessed it—a 1/2-sheet orbital sander is the 1/4-sheet orbital sander’s big brother. Designed to use half of a standard 9×11 sheet of sandpaper, the 1/2-sheet orbital sander is a much larger tool to operate, and can’t comfortably be used with one hand. Its larger size means you can cover a lot of ground, but it makes it very difficult to sand smaller areas and detailed work.
Belt Sander
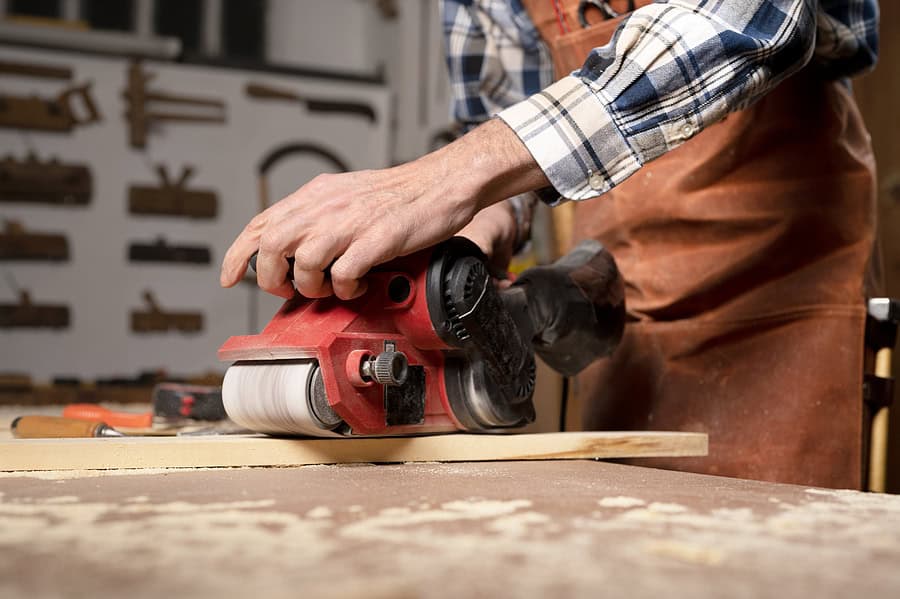
Best for: Stripping finishes, removing material, and reshaping wood
Cost: $40 to $350
Rather than their movement, belt sanders get their name from the type of sandpaper they use, which comes in the form of a belt. The belt slips over two rollers and moves in a continuous rotation. This constant one-directional movement allows the belt sander to quickly eat through rough wood or stubborn old finishes. However, its aggressive sanding nature makes it a poor option for final sanding and finish work. When using a belt sander, you can minimize the amount of visible sanding marks by keeping the belt parallel with the grain of the wood.
Oscillating Multitool
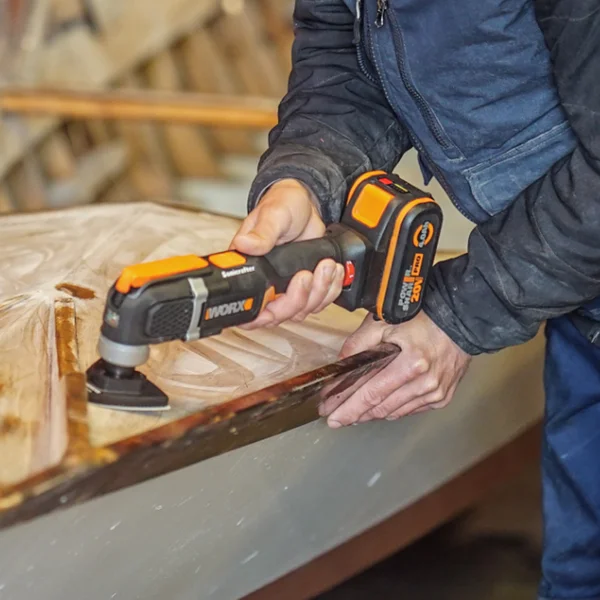
Best for: Tight spots, corners, small objects
Cost: $30 to $160
While not strictly a sander, oscillating multitools feature an optional sanding attachment alongside several other attachments. Hence the name “multitool.” Oscillating multitools earned their spot on this sander-specific list because the sanding head is incredibly useful and can go places many other sanders simply can’t fit. The compact, triangular design of the sanding head allows it to reach into tight corners with ease, sanding surfaces that have long been left to hand sanding. However, the small head makes these sanders less effective for sanding large flat surfaces.
Which Type of Sander to Buy First
An avid do-it-yourselfer will eventually find a use for every sander on this list. So, how do you decide which sander to buy first? We recommend you purchase a random-orbit sander as your first power sander. Random-orbit sanders can handle nearly any DIY task. Sure, they won’t smooth gnarly wood as quickly as a belt sander or sand details like an oscillating multitool, but they can do just about anything when paired with the right sandpaper grit.