Your garage door stops mid-open, the opener light starts flashing, and you have no idea what it means. That flashing pattern is not random — it is your LiftMaster telling you exactly what is wrong. This guide covers every diagnostic error code with plain-English explanations and step-by-step fixes. Most common issues — especially sensor-related ones — are DIY-fixable in under 30 minutes.
Table of Contents
- About LiftMaster Systems
- How LiftMaster Error Codes Work
- Quick Troubleshooting Checklist
- Tools You’ll Need
- Full Error Code List + Fixes
- Flashing Light Codes (Older Models)
- MyQ App Error Codes
- How to Reset Your LiftMaster Opener
- Troubleshooting Decision Tree
- When to Call a Professional
- Preventing Future Errors
- Quick Reference Table
- FAQ
About LiftMaster Systems
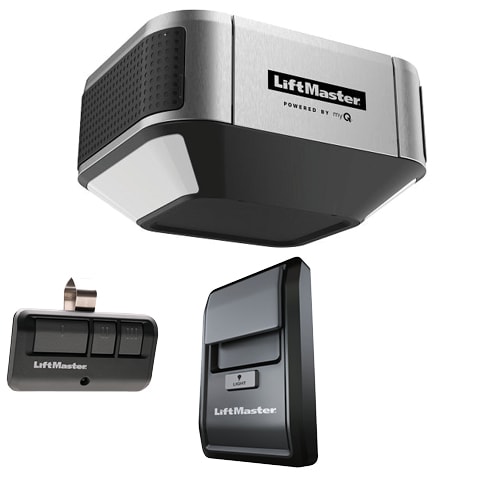
Before diving into error codes, it helps to understand what you are working with. LiftMaster is a brand owned by Chamberlain Group, one of the largest garage door opener manufacturers in the world. Chamberlain Group also produces Chamberlain and Craftsman branded openers — and many of their diagnostic error codes overlap, so this guide is useful across all three brands.
LiftMaster openers are used in both residential and commercial settings — from single-family homes to warehouses and parking facilities. Their reputation for reliability comes down to three core technologies:
- Security+ 2.0 — a rolling-code radio frequency system that generates a new access code on every use, preventing relay attacks that plagued older fixed-code systems.
- MyQ Smart Integration — allows remote monitoring and control via smartphone app, compatible with Google Assistant, Amazon Alexa, and Apple Home (via third-party bridge).
- DC belt and chain drive motors — quieter and more durable than older AC motor designs, with soft start and stop for smoother operation.
One of LiftMaster’s most underappreciated features is its built-in diagnostic error code system. The logic board’s LED indicators can identify the exact fault, meaning you can self-diagnose without calling a technician in the majority of cases.
ℹ️ Not Sure Which Model You Have?
Check the label on the back or side of your opener unit. The model number starts with 4–5 digits, often followed by a letter (e.g., 8500W, 8165W, 8355, 8587). You will also find it in your owner’s manual or on the original box.
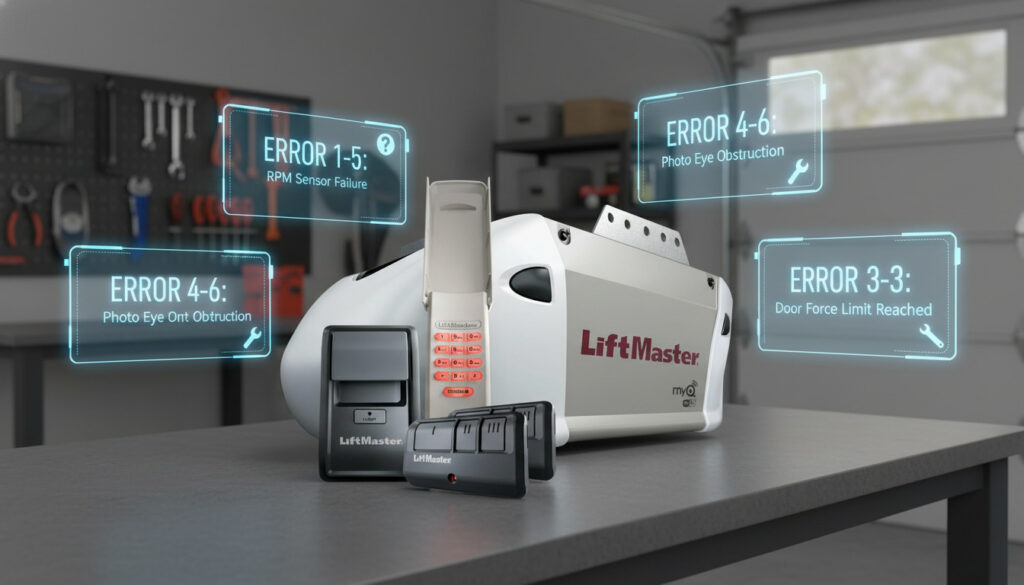
How LiftMaster Error Codes Work

LiftMaster uses two different diagnostic systems depending on the age of your opener.
Modern Models (2010–Present): Two-Arrow LED System
On current models, the logic board has two LED indicators — an up arrow and a down arrow. Count how many times the up arrow flashes, then how many times the down arrow flashes. These two numbers form the error code.
💡 Example: Up arrow flashes 1 time, down arrow flashes 3 times = Error Code 1-3 (Door Control Wire Shorted). Find 1-3 in the error codes section below.
Older Models (Pre-2010): Single Blink Count
Older LiftMaster openers use a single LED that blinks a set number of times in a repeating sequence. Count the total flashes in one sequence, then check the flashing light codes table in the Older Models section below.
Where to Find the Codes
- Logic board LED — inside the motor unit housing mounted to your ceiling or wall
- Wall control panel display — on newer MyQ models with a digital 880LM or 828LM wall panel
- MyQ app — app-connected models send error notifications directly to your phone
Acting on error codes early is always worthwhile. A misaligned sensor ignored for months can eventually wear down logic board components as the motor repeatedly attempts and aborts cycles.
Quick Troubleshooting Checklist (Try This First)
Before hunting down a specific error code, run through this checklist. About 20% of LiftMaster issues come down to one of these basic checks.
- ✅ Is the opener plugged in and receiving power?
- ✅ Have you checked or replaced the remote battery?
- ✅ Is anything physically blocking the door’s path?
- ✅ Are both safety sensor lights on — one green (receiving), one amber (sending)?
- ✅ Has there been a recent power outage? (May require reprogramming)
- ✅ Is the door manually locked? (Check the manual lock lever on the inside)
✅ Still showing a code? If you checked all of the above and the opener is still flashing, find your specific error code in the section below.
🧰 Tools You’ll Need
You won’t need all of these for every fix — the specific tools required are listed at the start of each error code. Here is the full set you might reach for:
- 🪛 Flathead screwdriver — for tightening sensor wire terminals on the logic board
- 🪜 Step ladder — to safely reach the motor unit overhead
- 🧹 Microfiber cloth — for cleaning sensor lenses without scratching
- ✂️ Wire stripper/cutter — for splicing or replacing sensor wiring
- 🛢️ Silicone lubricant spray — for tracks, rollers, hinges (silicone-based only, not WD-40)
- 🔌 18–22 AWG bell wire — for replacing full sensor wire runs (approx. $8 at hardware stores)
- 🔬 Multimeter (optional) — for testing wire continuity if you suspect a short
LiftMaster Error Codes: Full List + Step-by-Step Fixes
Each code below includes what it means, the most common cause, and numbered steps to fix it. Search variants are included so you can confirm you have landed on the right code.
⚠️ Error Code 1-1: Safety Sensors Not Detected
📌 Applies to: All models with safety sensors
🔍 If you searched “LiftMaster error code 1-1” or “LiftMaster sensors not working” — this is your fix.
What it means: The opener cannot detect that safety sensors are installed, connected, or the wires may be completely cut.
Most common cause: Loose or disconnected wiring at the sensor or at the logic board terminals.
Tools needed: Flathead screwdriver, step ladder
- Unplug the opener from power before touching any wiring.
- Locate both sensors at the base of your door tracks — approximately 6 inches from the floor, one on each side.
- Check the wiring harness for cuts or loose connections at the white/grey terminals on the logic board.
- Verify both the sending sensor (amber LED) and receiving sensor (green LED) are physically plugged in.
- Reconnect any loose wires and tighten with a flathead screwdriver.
- Plug the opener back in and test.
🔵 LiftMaster 8500W note: On the 8500W wall-mount model, sensor terminals are on the side of the unit rather than underneath. Check the 8500W wiring diagram in your manual if you cannot locate them.
⚡ Still not working? The wire itself may be damaged — move to Code 1-2.
⚠️ Error Code 1-2: Safety Sensor Wire Shorted
📌 Applies to: All models with safety sensors
🔍 If you searched “LiftMaster 1-2 error” or “LiftMaster sensor wire problem” — this is your fix.
What it means: A short circuit has been detected in the sensor wiring, or wire polarity is reversed.
Most common cause: Wire pinched by a staple, cut by a sharp edge, or insulation worn through over time. Reversed wires (black/white polarity swapped) also trigger this code.
Tools needed: Wire stripper/cutter, 18–22 AWG bell wire, flathead screwdriver
- Unplug the opener.
- First, confirm the white and black sensor wires match the correct terminals on the opener — reversed polarity is a common and overlooked cause of this code. Swap them if reversed and test before proceeding.
- If polarity is correct, run your hand along the entire wire length from each sensor to the motor unit.
- Look carefully for staples driven through the wire, kinks, cuts, or worn insulation — especially near corners and staple points.
- If damage is found, cut out the damaged section and splice in fresh 18–22 AWG wire.
- Alternatively, replace the full wire run — hardware store bell wire costs under $10.
- Reconnect at both ends and test.
⚡ Still not working? Sensors may need realignment — move to Code 1-3.
⚠️ Error Code 1-3: Door Control Wire Shorted
📌 Applies to: Models with wired wall controls
🔍 If you searched “LiftMaster error code 1-3 fix” or “LiftMaster wall button not working” — this is your fix.
What it means: The wall control panel wiring is shorted or has been held closed for more than 4 seconds. Your remote may still work, but the wall button does not respond.
Most common cause: Damaged wiring between the wall control and the motor unit, or a faulty wall button that is stuck in the closed position.
Tools needed: Flathead screwdriver, 22 AWG wire
- Disconnect the wall control wires at the motor unit terminal screws.
- If the error code clears when the wires are disconnected, the fault is in the wire run or wall button itself — not the logic board.
- Inspect the full wire run from the wall button to the motor unit for damage, pinches, or staples piercing the insulation.
- Replace any damaged sections with fresh 22 AWG wire.
- Reconnect and test the wall button.
⚡ Still not working? Check the wall control button itself — press and hold it to confirm it is not stuck. If the button is stuck or faulty, replace the wall control unit.
⚠️ Error Code 1-4: Safety Sensors Misaligned
📌 Applies to: All models with safety sensors
🔍 If you searched “LiftMaster error code 1-4 fix” or “LiftMaster sensor alignment problem” — this is your fix.
What it means: The sending and receiving sensors are not pointing directly at each other, or were momentarily obstructed.
Most common cause: A sensor was bumped, its bracket loosened from repeated door vibration, or sensors were never properly aligned after installation.
Tools needed: Adjustable wrench or flathead screwdriver, microfiber cloth
- Look at both sensors: the sending sensor (amber LED) should be solid, and the receiving sensor (green LED) should also be solid.
- If the green LED is blinking or off, the sensors are misaligned.
- Loosen the wing nut on the receiving (green) sensor bracket.
- Slowly pivot the sensor left, right, up, and down until the green LED glows solid.
- Hold the sensor in that position and tighten the wing nut without shifting it.
- Wipe both sensor lenses clean with a microfiber cloth.
- Test the door with your remote.
☀️ Pro Tip: Do this in daylight conditions. Direct sunlight hitting the sensor lens can cause a false misalignment reading — try shading the sensor with your hand to confirm alignment.
🔵 LiftMaster 8165W note: This model uses a slightly shorter sensor bracket. If the bracket stays loose even when tightened, replacement bracket part #41A5034 is a permanent fix.
⚠️ Error Code 1-5 / 5-1: RPM Sensor or Travel Module Failure
📌 Applies to: Models with DC motors
🔍 If you searched “LiftMaster 5-1 error”, “LiftMaster 1-5 error”, or “LiftMaster RPM sensor problem” — this is your fix.
What it means: The motor’s speed sensor is not functioning correctly, or the travel module cannot communicate with the logic board. Code 1-5 and 5-1 are closely related and share the same diagnostic path.
Most common cause: Faulty RPM sensor, a loose wiring harness connector inside the motor unit, or dust and grease on the optical sensor windows.
Tools needed: Flathead screwdriver, step ladder
- Unplug the opener from power.
- Open the motor unit cover (consult your model’s manual — typically 2–3 screws).
- Locate the RPM sensor or travel module — a small component attached near the motor shaft.
- Check that the wiring harness connector is fully and firmly seated.
- If there is visible dust or grease on the optical sensor windows, carefully wipe them clean with a dry cloth.
- Reseat the connector, close the unit, plug in, and test.
- If the code returns, the RPM sensor or travel module needs replacement. Replacement parts are available from LiftMaster suppliers or Amazon for $15–$30.
⚠️ Error Code 4-1: Excessive Closing Force / Travel Limit Not Set
📌 Applies to: Security+ 2.0 and newer models
🔍 If you searched “LiftMaster 4-1 error” or “LiftMaster door won’t open fully” — this is your fix.
What it means: The opener detects too much resistance while closing — causing it to reverse — or it does not know how far to travel in the open or close direction.
Most common cause: Travel limits were never programmed or were erased after a power outage. Also triggered by binding tracks or an uneven floor.
- Press and hold the “Up” travel limit button on the logic board until the door begins to move.
- Release when the door reaches the fully open position.
- Press “Set” to save the limit.
- Repeat for the close direction if needed (hold “Down” travel limit button, release when door rests flush on the floor).
- Test with your remote through a full cycle.
🔵 LiftMaster 8355 note: Travel limits on the 8355 are set via the multi-function door control panel: press Menu → Travel Limits → Up Limit to begin.
⚠️ Error Code 4-2: Excessive Opening Force Detected
📌 Applies to: Security+ 2.0 and newer models
🔍 If you searched “LiftMaster 4-2 error” or “LiftMaster door won’t close fully” — this is your fix.
What it means: The opener detects unusual resistance while lifting the door upward.
Most common cause: Broken torsion spring (most common), a locked manual slide bolt, or binding rollers.
- Pull the red emergency release cord to disconnect the opener from the door.
- Manually lift the door halfway — it should stay in place. If it drops, a torsion spring is likely broken. Stop here and call a professional.
- If the door lifts smoothly by hand, the issue is with the travel limit settings. Press and hold the “Down” travel limit button to reprogram the close limit.
- Test with your remote.
⚠️ Important Safety Warning: If the door feels extremely heavy or dropped suddenly, a torsion spring is almost certainly broken. Do not attempt torsion spring replacement yourself — this spring is under extreme tension and causes serious injuries. Call a professional immediately.
⚠️ Error Code 4-4: Loss of RPM During Up Travel
📌 Applies to: All motorized models
🔍 If you searched “LiftMaster code 4-4 door won’t close” or “LiftMaster force error” — this is your fix.
What it means: The motor speed drops significantly during the upward travel cycle, triggering a safety stop. This is more specific than a general force error — the motor is losing RPM while lifting.
Most common cause: Door binding in the tracks, worn rollers, lack of lubrication, or a broken spring adding resistance during opening.
Tools needed: Silicone lubricant spray, step ladder
- Pull the red emergency release cord to disconnect the opener from the door.
- Manually open and close the door — does it move smoothly and evenly by hand?
- If it catches, sticks, or feels heavy: wipe the full track length with a dry cloth first, then apply silicone lubricant to rollers, hinges, and both tracks.
- Check both tracks for dents, debris, or misalignment. Clear anything blocking smooth travel.
- Reconnect the opener and test.
⚠️ Important: If the door feels extremely heavy or you heard a snapping sound recently, a torsion spring may be broken. Do not attempt spring replacement yourself — call a professional.
🔵 LiftMaster 8587 note: This belt drive model is particularly sensitive to track debris. Always wipe the track clean before lubricating to prevent debris from binding against the rollers.
⚠️ Error Code 4-6: Limit Switch Issue / Persistent Sensor Error
📌 Applies to: Security+ 2.0 and newer models
🔍 If you searched “LiftMaster 4-6 error” or “LiftMaster door stopping short” — this is your fix.
What it means: The door is not reaching its programmed open or close limit. This code can also appear when the opener receives a Close command while a sensor obstruction from codes 1-1 through 1-4 is still active.
Most common cause: Limit settings corrupted, a physical obstruction stopping the door short, or an unresolved sensor issue running alongside this code.
- First, confirm there are no active sensor codes (1-1 through 1-4) — resolve those first if present.
- Reprogram travel limits following the Code 4-1 steps above.
- Check the full door path for any object stopping the door before it reaches the limit point.
- Inspect the limit switch hardware on the rail for visible damage or wear.
⚠️ Error Code 5-2: Motor Overcurrent / Motor Overload
📌 Applies to: All motorized models
🔍 If you searched “LiftMaster 5-2 motor overload solution” or “LiftMaster motor not working” — this is your fix.
What it means: The motor drew more current than expected — it either strained under resistance or briefly overloaded.
Most common cause: Door resistance (check Code 4-4 first), motor overheating, or a failing motor.
- Let the opener cool down for 15–30 minutes. LiftMaster motors have thermal protection that needs time to reset.
- Pull the red emergency cord to disconnect the opener from the door.
- Briefly run the motor without the door attached.
- If the motor runs cleanly without the door: the door is causing the resistance — work through Code 4-4 steps.
- If the motor still shows Code 5-2 with no door connected: the motor is likely failing and needs professional assessment or replacement.
⚠️ Error Codes 6-1, 6-2, 6-3: Communication Error — Wall Control or MyQ
📌 Applies to: MyQ-enabled models, 828LM / 880LM wall controls
🔍 If you searched “LiftMaster 6-1 error”, “LiftMaster 6-2 error”, or “LiftMaster wall control not responding” — this is your fix.
What it means: The opener and wall control or MyQ system have lost communication. Codes 6-2 and 6-3 indicate an extended or persistent version of the same communication failure.
Most common cause: Loose wiring between the wall control and motor unit, or a MyQ connectivity disruption.
- Check wires running from the wall control to the motor unit — inspect for loose connections at both ends.
- Disconnect and firmly reconnect the wall control wires at the terminal screws.
- If using MyQ: open the MyQ app → Settings → select your device → tap “Restart Device.”
- For codes 6-2 or 6-3: hold the “Learn” button for 10 seconds to perform a full reset, then re-add the device in the MyQ app.
- Ensure your Wi-Fi router is within range of the opener — ideally within 30 feet, or use a Wi-Fi extender.
- If the error persists, replace the wall control wires with a fresh run of 22 AWG bell wire.
🔵 LiftMaster 8500W note: The 8500W wall-mount design often means a longer communication wire run than ceiling-mount models. Long runs are more susceptible to interference — try shielded 22 AWG wire if the issue is persistent.
💡 Expert Insight: “Most LiftMaster issues we see in the field aren’t motor failures — they’re sensor alignment problems caused by vibration over time. Always check Codes 1-4 first before assuming something serious is wrong. Nine times out of ten, a two-minute sensor adjustment is all it takes.”
— Garage door systems technician, 12+ years experience
Flashing Light Codes (Older LiftMaster Models, Pre-2010)

ℹ️ This section is for older LiftMaster models that use a single blinking LED rather than the two-arrow up/down system. If your opener has up and down arrow LEDs, go back to the error codes section above.
| Flash Count | Meaning | Quick Fix |
|---|---|---|
| 1 flash | Door not fully closing / sensor block | Check travel limits; check for sensor obstruction |
| 2 flashes | Safety sensor issue | Check alignment and wiring |
| 4 flashes | Safety sensor misaligned | Realign sending and receiving sensors |
| 5 flashes | RPM sensor / motor issue | Check door balance; replace RPM sensor if needed |
| 6 flashes | Logic board / motor circuit failure | Replace logic board — professional recommended |
| Continuous | Short circuit / wiring fault | Inspect full wiring run from sensors to motor |
MyQ App Error Codes & Notifications
MyQ app messages are different from hardware board error codes — they are generated by the cloud connection layer between your opener and Chamberlain’s servers. Here is how to read the most common ones:
| MyQ Notification | What It Means | What To Do |
|---|---|---|
| “Door left open” | A user-set alert — not a fault | Close the door or adjust alert settings in the app |
| “Unable to communicate with device” | Wi-Fi or hub connectivity disruption | Restart your router; ensure opener is within Wi-Fi range |
| “Device offline” | Power loss or internet outage at the opener | Check power at the opener; check your home internet connection |
| “Activation failed” | App account or device pairing issue | Sign out of MyQ app, sign back in, and re-add the device |
MyQ Reconnection Process (Step by Step)
- Open the MyQ app and tap the three-line menu → Devices.
- Tap your opener → tap the gear icon → tap “Delete Device.”
- On the opener, hold the Learn button for 10 seconds to fully reset Wi-Fi credentials.
- Return to the MyQ app → tap “+” to add a new device → follow the on-screen setup.
- Ensure your phone is connected to 2.4 GHz Wi-Fi (not 5 GHz) during setup.
📱 Hub vs. Built-In Wi-Fi Models: Older MyQ models (pre-2018) require a separate MyQ Internet Gateway hub to connect to the app. Newer models like the 8587W have Wi-Fi built directly into the motor unit. Confirm which setup you have before troubleshooting persistent app issues.
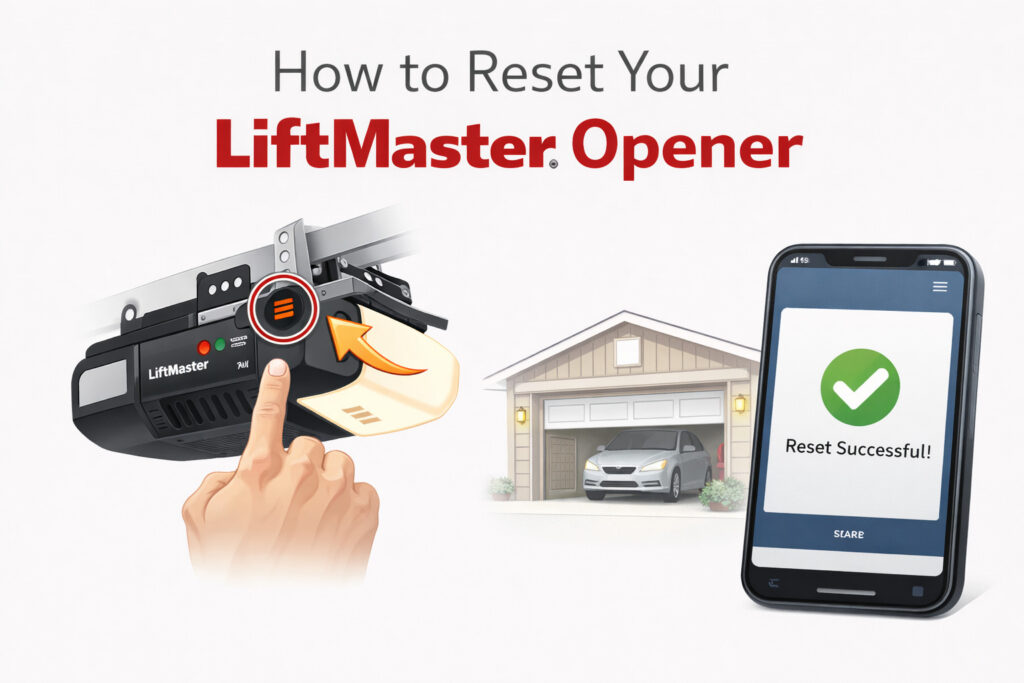
How to Reset Your LiftMaster Opener
When a Reset Helps vs. Doesn’t
- ✅ Reset will help: Corrupted settings, erased travel limits, remote pairing issues, persistent MyQ connectivity errors
- ❌ Reset won’t help: Physical sensor damage, broken springs, motor failure, shorted wiring
Step-by-Step Reset
- Locate the “Learn” button on your motor unit — typically on the back or side panel, next to a small LED indicator.
- Press and hold the Learn button for 6–10 seconds until the LED beside it goes out completely.
- Release the button. All remote and keypad codes are now erased.
- To reprogram a remote: press the Learn button once (quick press), then within 30 seconds press the button on your remote. The opener light will flash to confirm.
- To reprogram a keypad: press Learn once, then enter your chosen PIN on the keypad followed by the Enter key.
- Test the full open/close cycle.
Learn Button Color Reference
| Button Color | Frequency | Common Models |
|---|---|---|
| Yellow | 315 MHz | Pre-2011 residential models |
| Purple | 390 MHz | Mid-era residential models |
| Red / Orange | Security+ 2.0 | 8165W, 8500W, 8355, 8587 |
Troubleshooting Decision Tree
Not sure where to start? Work through these four questions in order:
- 🔴 Is the opener completely dead? → Check power and outlet → If power is confirmed and it still won’t start, the logic board may need replacement → Call a professional.
- 🔴 Is the door reversing mid-travel? → Check for physical obstruction in the door’s path → If the path is clear, reprogram travel limits (Codes 4-1 / 4-2).
- 🔴 Is the door refusing to close? → Check both sensor LEDs (Codes 1-1 through 1-4) → Realign sensors or fix wiring as directed above.
- 🔴 Is the motor humming but the door not moving? → Disconnect the door and manually test for a broken spring (Code 4-2) → If spring is broken, call a professional immediately.
When to Call a Professional
Most LiftMaster error codes are genuinely DIY-fixable. But there are clear situations where stopping and calling a professional is the right call — both for your safety and to avoid making things worse.
Call a professional if any of the following apply:
- ☎️ You heard a loud bang or snapping sound — this almost always means a broken torsion spring.
- ☎️ The door fell, dropped suddenly, or is hanging unevenly.
- ☎️ There is a burning smell coming from the motor unit.
- ☎️ The same error code returns within 48 hours of completing your repair.
- ☎️ The logic board has visible burn marks, scorch damage, or melted components.
- ☎️ Any work would involve the torsion spring mounted above the door.
Typical Professional Service Costs (2026)
| Service | Typical Cost Range |
|---|---|
| Standard service call | $75–$150 |
| Torsion spring replacement | $150–$300 |
| Logic board replacement | $100–$200 (parts + labor) |
| Full opener replacement (installed) | $300–$600 |
Preventing Future LiftMaster Errors
The majority of LiftMaster error codes — particularly sensor and force codes — are preventable with a simple maintenance routine. Here is a schedule that takes less than 30 minutes per year in total:
📅 Monthly
- Wipe sensor lenses with a dry microfiber cloth
- Visually inspect sensor wiring for nicks, pinches, or wear
- Check that both sensor LEDs are glowing solid
📅 Every 3 Months
- Apply silicone-based lubricant to rollers, hinges, and tracks
- Test the auto-reverse safety function: place a 2×4 flat on the ground in the door’s path — the door must reverse on contact
- Check and tighten all visible hardware bolts
📅 Annually
- Test the manual disconnect cord for smooth operation
- Check door balance: disconnect the opener, lift the door halfway manually — it should stay in place without drifting
- Inspect and replace weather stripping if cracked or compressed
❄️ Cold Climate Note (Important for Winter 2026): In freezing temperatures, metal sensor brackets contract slightly and can shift sensors out of alignment. Check and reconfirm sensor alignment every fall before temperatures drop below freezing. This single step prevents the most common winter service calls.
LiftMaster Error Codes: Quick Reference Table
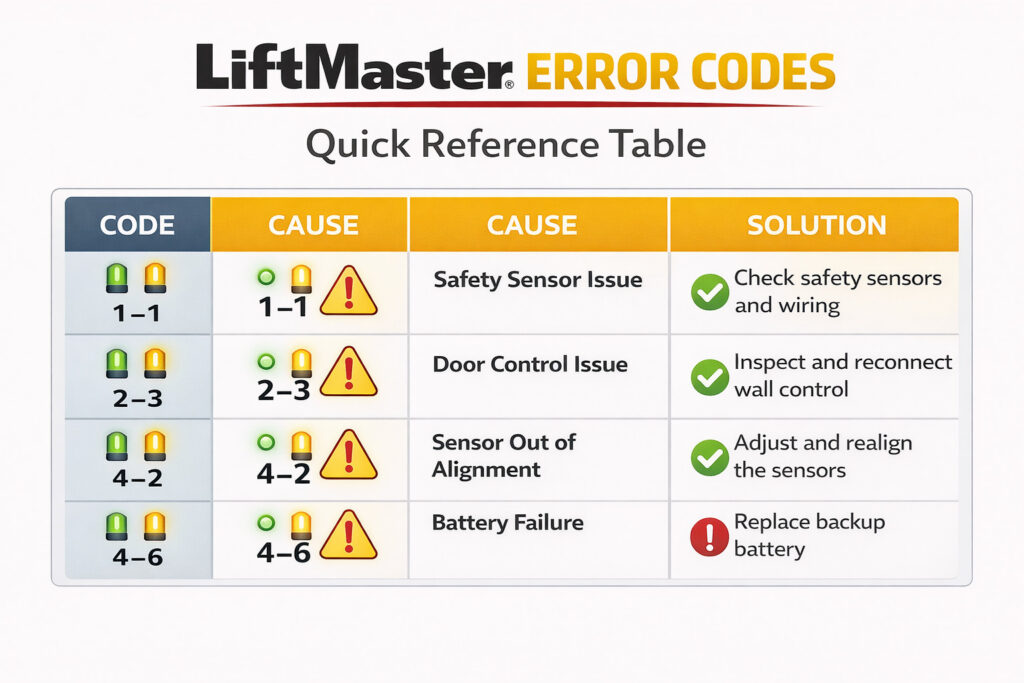
Here’s a quick overview of the most common LiftMaster error codes and how to fix them:
| Code | Meaning | Quick Fix |
|---|---|---|
| 1-1 | Sensors not detected | Reconnect wiring at logic board terminals |
| 1-2 | Sensor wire shorted or polarity reversed | Check polarity first; inspect and replace wire |
| 1-3 | Door control wire shorted | Inspect wall control wiring; replace if damaged |
| 1-4 | Sensors misaligned | Realign until green LED glows solid |
| 1-5 / 5-1 | RPM sensor / travel module failure | Reseat connector; replace sensor if needed |
| 4-1 | Excessive closing force / open limit not set | Reprogram travel limits; check tracks |
| 4-2 | Excessive opening force detected | Check for broken spring; reprogram close limit |
| 4-4 | Loss of RPM during up travel | Lubricate door + inspect tracks and springs |
| 4-6 | Limit switch / persistent sensor issue | Resolve sensor codes first; then reprogram limits |
| 5-2 | Motor overcurrent | Check door resistance; assess motor |
| 6-1 | Wall control comms error | Check wiring and restart MyQ |
| 6-2 / 6-3 | MyQ extended comms error | Full MyQ reset and Wi-Fi check |
Frequently Asked Questions
Why is my LiftMaster blinking but not opening?
A blinking light without the door moving means the opener has detected a fault and locked itself out for safety. Count the flashes on both the up and down LEDs, then match them to the error code list above. The most common culprits are sensor misalignment (Code 1-4) or a travel limit issue (Codes 4-1 or 4-2). Start with the Quick Troubleshooting Checklist at the top of this guide first.
How do I clear a LiftMaster error code?
Fixing the underlying problem clears the code automatically — there is no separate “clear” button. Once the sensor is realigned or the wiring is repaired, the code disappears on the next successful operation cycle. If you want to wipe all settings and start fresh, hold the Learn button for 10 seconds to perform a factory reset.
Can I bypass the safety sensors?
Technically possible on older models, but strongly not recommended and potentially illegal in some jurisdictions. Safety sensors exist specifically to prevent the door from closing on a person, child, or pet. If your sensors are faulty, replacing or realigning them is always the right move. Bypassing them creates a genuine injury risk.
Why does my garage door reverse right before closing?
This is almost always a sensor issue — misalignment (Code 1-4), an obstruction, or direct sunlight interfering with the sensor beam. The opener reverses as a built-in safety response when it cannot confirm the beam is clear. Check both sensor LEDs: the amber sender should be solid, and the green receiver should be solid. If either is blinking, start with Code 1-4.
Is it safe to fix LiftMaster error codes myself?
Most sensor, wiring, and travel limit fixes are safe and straightforward with basic tools. The firm exception is anything involving the torsion spring mounted above the door — this component is under extreme tension and causes serious injuries when handled without professional training. If your diagnosis points to the spring, stop and call a professional.
Do LiftMaster error codes apply to Chamberlain openers?
Yes, in many cases. Chamberlain Group manufactures both LiftMaster and Chamberlain branded openers, and many models share the same logic board architecture. Error codes 1-1 through 6-3 often apply to Chamberlain openers as well. Always verify against your specific model’s manual to confirm, as there are some model-specific differences.
How often should I check my LiftMaster sensors?
A quick visual check once a month takes under a minute — just confirm both LEDs are glowing solid. A more thorough cleaning and alignment check is worth doing every autumn, especially if you live in a climate with cold winters. Vibration from regular door operation is the biggest cause of gradual sensor drift over time.
Final Thoughts
The vast majority of LiftMaster error codes point to one of three root causes: a sensor problem, a wiring issue, or a travel limit that needs reprogramming. All three are genuinely DIY-fixable with basic tools and a bit of patience.
When you need to fix LiftMaster error codes, use this guide as your reference: start with the Quick Checklist in Section 3, find your specific code in Section 5, and use the Decision Tree in Section 9 if you are not sure where to begin. Bookmark this page — the Quick Reference Table alone is worth having on hand.
For anything involving the torsion spring, visible burn marks on the logic board, or a motor that fails even with the door disconnected, the right call is a professional. For everything else, you have got this.