Wiring a 3-way light switch can significantly enhance your home’s lighting functionality. This comprehensive guide will walk you through the process, ensuring you can safely and effectively install a 3-way switch setup.
Understanding 3-Way Light Switches
A 3-way light switch allows you to control a light fixture from two different locations. This setup is ideal for staircases, long hallways, or large rooms with multiple entrances. Unlike standard single-pole switches, 3-way switches don’t have “On” and “Off” positions marked because the circuit can be opened or closed from either switch location

Safety First: Essential Precautions
Before beginning any electrical work, prioritize safety:

- Turn off the power at the circuit breaker or fuse box.
- Use a voltage tester to confirm that the power is indeed off.
- Wear protective gear, including insulated gloves and safety goggles.
- Never work on live circuits.
Remember, if you’re unsure about any step in the process, it’s always best to consult a licensed electrician.
Tools and Materials Needed
To wire a 3-way light switch, you’ll need:
- Screwdrivers (flathead and Phillips)
- Wire strippers
- Needle-nose pliers
- Voltage tester
- Two 3-way switches
- Electrical wire (14/3 or 12/3 NM cable, depending on the circuit amperage)
- Wire nuts
- Electrical tape
Ensure you have all these tools and materials on hand before starting the project.
Understanding 3-Way Switch Wiring
Before you begin the wiring process, it’s crucial to understand how 3-way switches work:

- 3-way switches have three terminals: one common terminal and two traveler terminals.
- The common terminal is usually a darker color or labeled “COM.”
- Traveler terminals are interchangeable and typically brass-colored.
- Unlike regular switches, 3-way switches don’t have “On” and “Off” positions.
Step-by-Step Wiring Process
Now, let’s dive into the wiring process:
1. Turn Off Power and Remove Old Switches

- Locate the circuit breaker controlling the light fixture and switch it off.
- Use your voltage tester to confirm that the power is off at both switch locations.
- Remove the old switches and carefully pull out the wires.
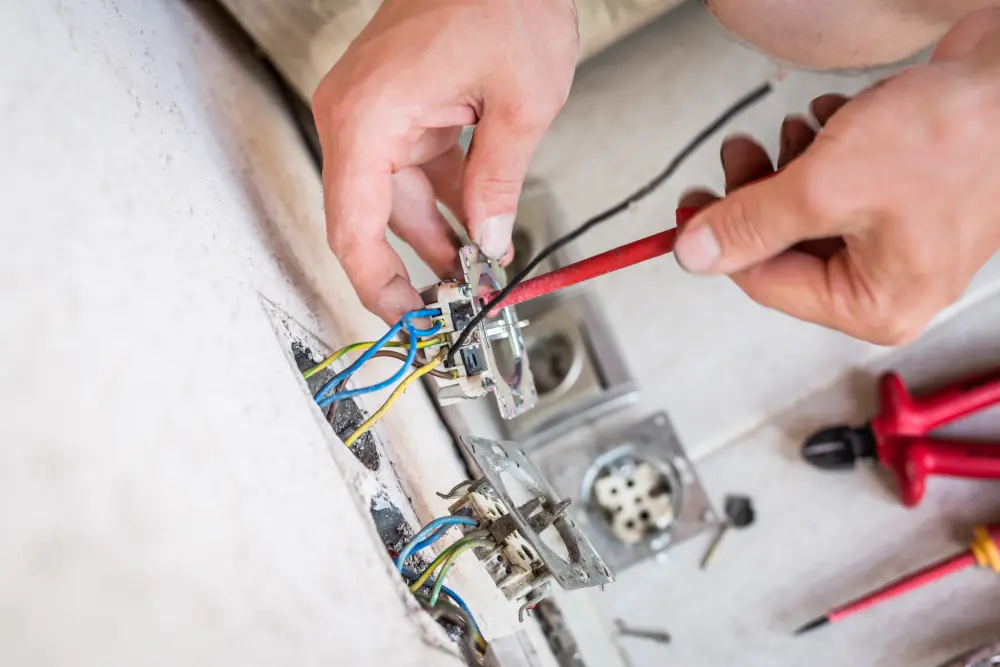
2. Identify and Label Wires

- At the first switch box, you should find:
- One black (hot) wire
- One white (neutral) wire
- One red wire (traveler)
- One black/red wire (traveler)
- One bare copper or green wire (ground)
- At the second switch box, you should see:
- Two traveler wires (usually red and black/red)
- One wire leading to the light fixture
- One ground wire
- Label these wires for easy identification during installation.
3. Wire the First Switch
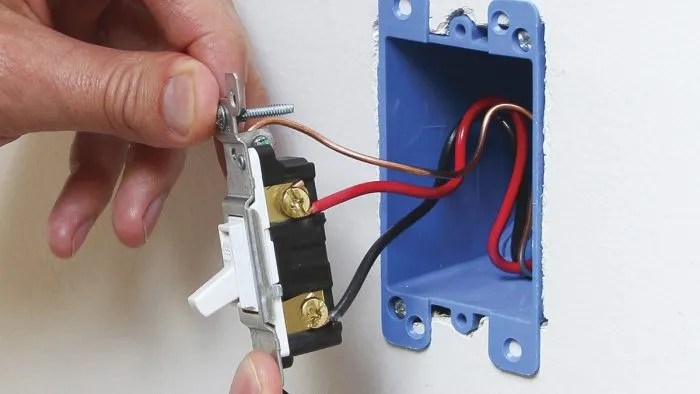
- Connect the black (hot) wire to the common terminal.
- Attach the two traveler wires (red and black/red) to the traveler terminals.
- Connect the ground wire to the green screw on the switch.
4. Wire the Second Switch
- Connect the wire leading to the light fixture to the common terminal.
- Attach the two traveler wires to the traveler terminals, matching the configuration of the first switch.
- Connect the ground wire to the green screw.
5. Mount Switches and Restore Power
- Carefully tuck the wires back into the boxes and mount the switches.
- Replace the switch plates.
- Turn the power back on at the circuit breaker.
Testing Your 3-Way Switch Installation
After completing the installation, it’s essential to test your work:

- Turn on the light using one switch.
- Use the other switch to turn it off.
- Repeat this process several times, ensuring both switches can control the light independently.
If the switches don’t function correctly, double-check your wiring connections and ensure all wire nuts are secure.
Troubleshooting Common Issues
Even with careful installation, you may encounter some issues. Here are some common problems and their solutions: Lights Don’t Work at All
- Check if the circuit breaker is on
- Ensure all wire connections are secure
- Verify that the light bulb isn’t burned out
Switches Don’t Function Properly
- Double-check that traveler wires are connected to the correct terminals
- Ensure the common wire is connected to the common terminal on both switches
Flickering Lights
- Tighten all wire connections
- Check for loose wire nuts
- Inspect the light fixture for loose connections
If you’re unable to resolve these issues, it’s best to consult a professional electrician.
Additional Tips and Considerations
Following Local Electrical Codes
Always adhere to local electrical codes when wiring a 3-way switch. These codes may vary by location and can include specific requirements for wire gauge, grounding, and installation methods. Familiarize yourself with your area’s regulations before starting the project.
Upgrading to Smart 3-Way Switches
For those interested in home automation, consider upgrading to smart 3-way switches. These devices offer additional features such as:
- Remote control via smartphone apps
- Voice control through virtual assistants
- Scheduling and timer functions
- Energy usage monitoring
When installing smart switches, follow the manufacturer’s instructions carefully, as the wiring process may differ from traditional 3-way switches.
Conclusion
Wiring a 3-way light switch is a manageable DIY project that can greatly enhance your home’s lighting functionality. By following this guide and adhering to safety precautions, you can successfully install a 3-way switch system. Remember to:
- Always prioritize safety by turning off power and using proper tools
- Understand the wiring diagram before beginning
- Follow each step carefully and double-check connections
- Test the switches thoroughly after installation
If at any point you feel unsure or uncomfortable with the process, don’t hesitate to seek help from a qualified electrician. With proper installation, your new 3-way switch setup will provide convenient lighting control for years to come.