Building a sturdy, functional clothesline post is a rewarding project that combines practicality with old-school charm. Whether you’re looking to reduce your energy bills or enjoy the fresh scent of sun-dried laundry, this guide will walk you through the process of crafting a wooden clothesline post from scratch. Let’s get started!
Step
What You’ll Do
Materials to Gather
Collect 4×4 posts, screws, cement, and tools like a miter saw and post-hole digger.
Cutting and Assembly
Shape the posts, crossbars, and braces for stability and functionality.
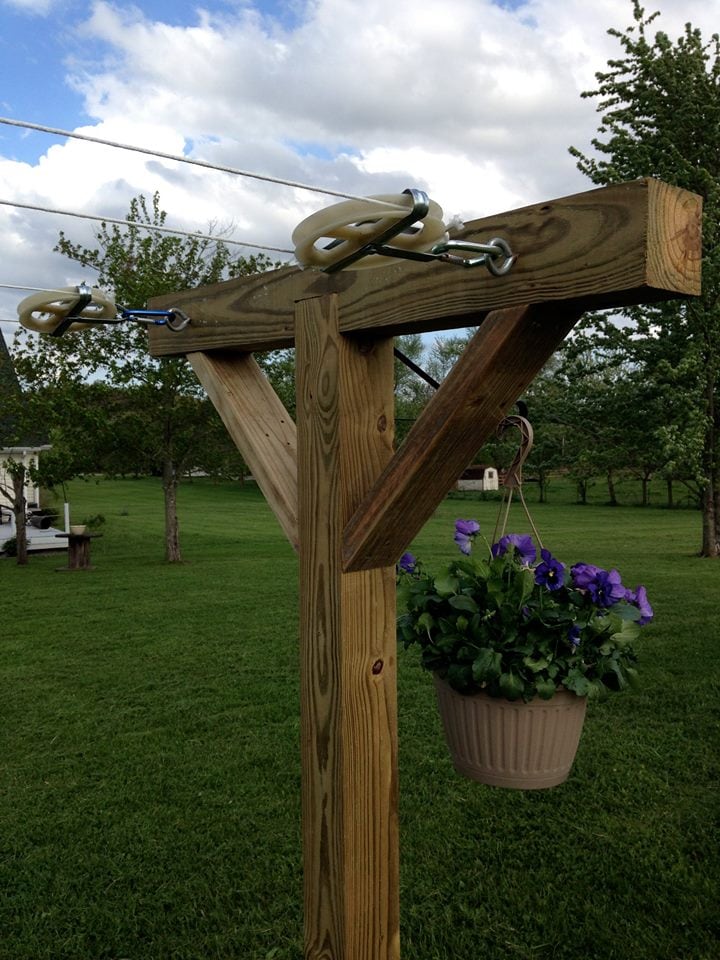
Attach hooks and thread weather-resistant clothesline wire.
Why Build Your Own Clothesline?
A DIY clothesline isn’t just about saving money—it’s about creating something durable and customized to your needs. Plus, it’s an eco-friendly alternative to using an energy-intensive dryer. Imagine hanging your laundry under the sun while enjoying a cool breeze—sounds idyllic, right?
Materials You’ll Need 🛠️
Before you start, gather these essentials:
Wood: 4×4 pressure-treated posts (8 feet long) for durability.
Fasteners: Lag screws, washers, and deck screws.
Clothesline Accessories: Eye bolts, screw hooks, and clothesline wire.
Concrete Mix: For securing the posts in the ground.
One 4×4 post cut into two 4-foot pieces for crossbars.
Four diagonal braces cut at 45-degree angles for extra stability.
2. Dig Post Holes
Using a post-hole digger:
Dig holes at least 24–36 inches deep and about 10–12 inches wide.
Add crushed rock at the base for drainage before setting the posts.
3. Assemble the Crossbars
Attach the crossbars to the top of each vertical post using lag screws:
Pre-drill holes to prevent splitting.
Use construction adhesive for added strength.
4. Add Diagonal Braces
Cut four braces (each about 24 inches long) at a 45-degree angle:
Secure them diagonally between each vertical post and its crossbar with screws.
This step ensures your clothesline can handle heavy loads without wobbling.
5. Set the Posts in Concrete
Place your posts into the holes:
Use a level to ensure they’re perfectly upright.
Pour concrete mix into each hole and let it cure for at least 24 hours.
Pro Tip: Spacing Between Posts
Keep your posts about 12–20 feet apart. If you plan to hang heavier items like blankets, avoid exceeding this range to prevent sagging.
Personal Insight 🌞
When I built my first clothesline post, I underestimated how important it was to get those posts perfectly level before pouring concrete. Let’s just say my first attempt leaned like the Tower of Pisa! Lesson learned: take your time with leveling—it makes all the difference.
Step-by-Step Instructions for Attaching Clotheslines
1. Choose Your Clothesline Wire
Opt for weather-resistant materials like vinyl-coated wire or braided nylon rope. These materials are durable and can withstand outdoor conditions without fraying or sagging.
2. Install Eye Bolts
Eye bolts are perfect for securely anchoring the clothesline to the wooden posts:
Drill pilot holes into the crossbars at equal intervals.
Screw in the eye bolts using a wrench, ensuring they’re tightly secured.
Space them evenly to allow multiple lines for hanging clothes.
3. Thread the Clothesline
Once the eye bolts are in place:
Attach one end of the clothesline wire to an eye bolt using a secure knot or clamp.
Thread the wire through each eye bolt on both posts, keeping it taut.
Secure the other end with another knot or clamp.
4. Tension Adjustment
To prevent sagging:
Use turnbuckles (small adjustable devices) between the eye bolts and the wire ends. These allow you to tighten or loosen the line as needed.
Pro Tip: Preventing Sagging
Over time, clotheslines may loosen due to weight or weather conditions. To combat this:
Regularly check the tension of your lines.
Replace worn-out wires promptly to maintain functionality.
Adding Finishing Touches 🎨
1. Weatherproofing Your Posts
Protect your wooden posts from moisture and UV damage:
Apply an outdoor wood sealant or paint designed for pressure-treated lumber.
Reapply every few years for optimal protection.
2. Decorative Elements
Want to add a personal touch? Consider:
Painting the posts in bright colors or patterns.
Adding hooks on the sides for hanging clothespin bags or small tools.
Maintenance Tips 🧹
Keep your clothesline in top shape with these simple tips:
Clean the lines periodically with a damp cloth to remove dirt and debris.
Inspect eye bolts and wire connections annually for signs of wear.
Trim any overhanging branches nearby that could damage the lines.
My Experience with DIY Clotheslines 🌿
When I first installed my wooden clothesline post, I underestimated how much tension was needed to keep it from sagging under wet towels. After adding turnbuckles, it became rock-solid—no more droopy lines! Plus, painting my posts a cheerful yellow added a pop of color to my backyard.
Wrapping It Up 🌟
With your clotheslines securely attached and your posts weatherproofed, you’re ready to enjoy hassle-free laundry days under the sun! This project not only saves energy but also adds charm and functionality to your outdoor space. For more DIY inspiration, check out our other guides on ProTGuide!


")